Mashing Together Pikachu & Deadpool To Create A Pikapool Clay Figure
What happens when you combine the adorably electrifying Pikachu from Pokemon with the snarky, sword-wielding merc with a mouth, Deadpool?
You get Pikapool — a mashup that’s as quirky as it is awesome! In this post, I’ll give you insights into polymer clay sculpting to create this unique character.
If you’re after a fun clay modelling project, this guide will take you through every step—from shaping the figure to adding those final, standout details. Grab your sculpting tools, unleash your creativity, and let’s bring Pikapool to life!
If you like what you see then don’t forget to hit the Subscribe button to help me grow my channel, leave a comment like it with a thumbs up.
What is Pikapool?
Pikpool is a fun fusion between two popular characters from two totally different worlds. One is cute, cuddly and can only say his name, while the other has no morals, talks shit and can kill you with a variety of different weapons.
Both fictional characters have been played by Ryan Reynolds, one of the most well-known Canadian actors of recent years.
So, what better way to celebrate these two characters than by merging them into a memorable clay action figure? It’s a fun and creative process that brings out the best of both characters, creating a Pikapool that might not move but has total charisma, especially when he’s in his sexy pose.
Research, Preparation & Tools
Before starting any clay sculpting project, it’s crucial to do your research, grab reference shots of what you’ll be creating, consider potential textures, and gather various accessories. This preparation will ensure you’re well-equipped and informed to start your Pikapool project.
Put them on a board in front of you. This will give you a great starting point to refer back to while you sculpt without having to waste time stopping and looking up different things.
It’s also important to make sure your workspace is clean and free from dust, as polymer clay picks up everything, and that you have your sculpting tools ready for action. This organization and preparedness will set the stage for a successful sculpting session.
Then, before you start sculpting, ensure you’ve conditioned your clay. You’ll need to squidge it around in your hands to warm it, and if you like using sheets of it like I do, then roll it out using your Pasta Maker prior to starting.
Then, you’re ready to start creating Pikapool!
Creating The Armature and Base Shape of Pikapool
For this clay figure, I decided to put the iconic red costume of Deadpool onto the body of the electric-type Pokemon Pikachu. You could have done it the other way around, but I like the red and black costume rather than the bright yellow.
To start, you’ll want to create a ball of tin foil and wrap it in a few layers of polymer clay. I used Sculpey because that’s what I had to hand. You could use Cosclay if you wish, or other types of oven-cured Polymer Clay are available.
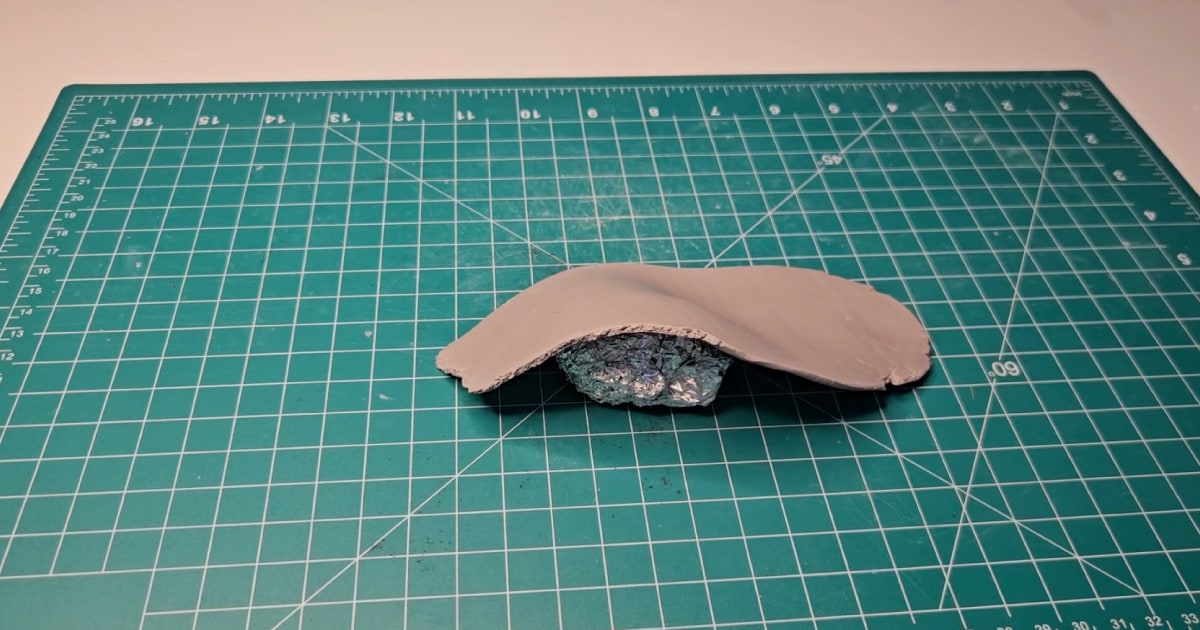
After I had shaped the main body, I added some 3mm armature wire to the foil to create the base for his legs and arms. These were then wrapped in clay to create the overall shape of Pikapool’s body.
I then made a smaller ball of tin foil and wrapped that in clay to make the head. With a bit of squidgeroo of the clay to form Pikapool’s face I then created another arm out of clay and added that into position.
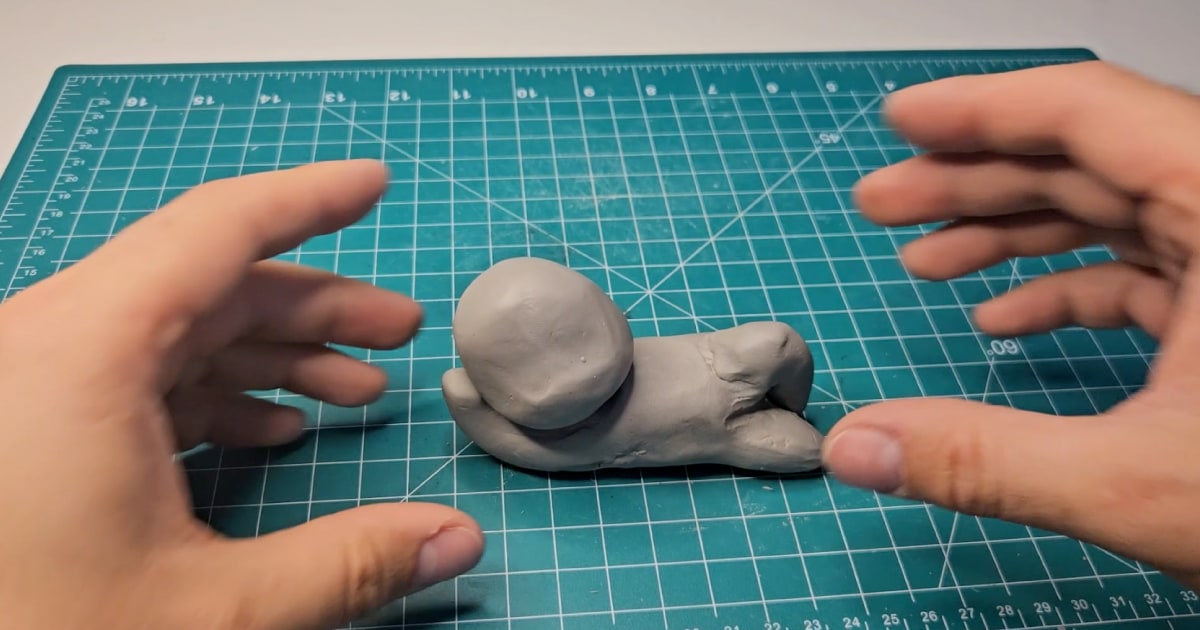
With the main structure of his body complete, I turned my attention to Pikachu’s iconic ears.
I rolled out two large worms of clay and shaped them to form his ears. I then used my sculpting tool to attach the ears to his head to finalise Pikapools’ birthday suit.
To make it easier to handle, I decided to bake Pikapool. This might have been a mistake because it made it slightly harder for any more clay to stick to, but it worked out okay in the end.
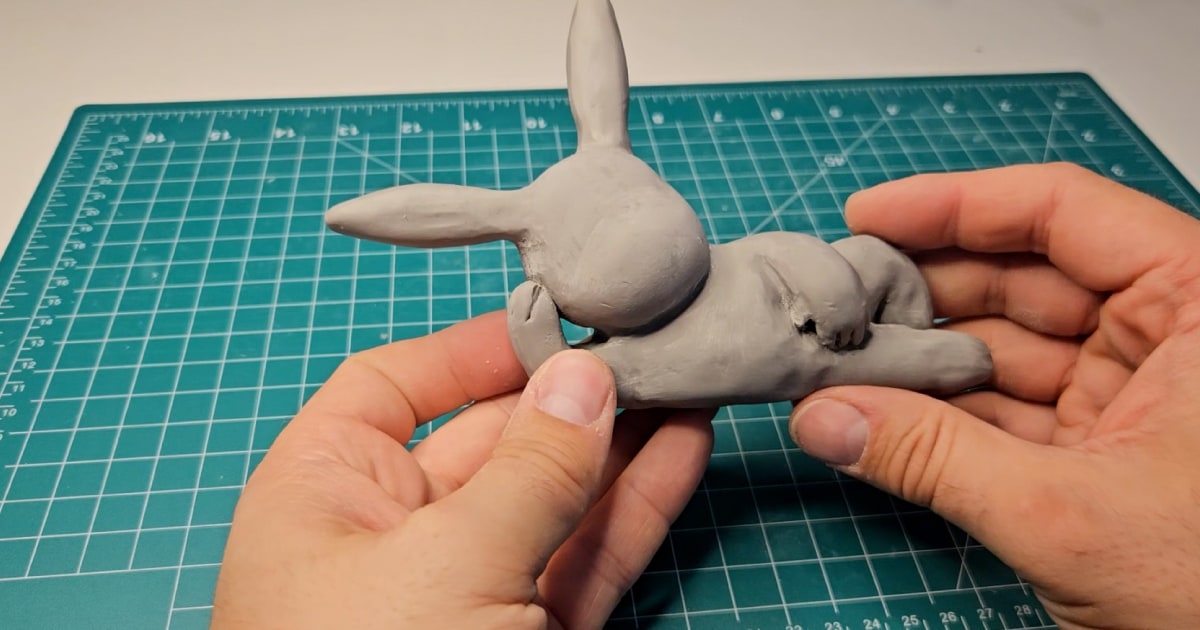
After baking, it was time to add Deadpool’s clothes and mercenary accessories to my clay figure.
Adding Deadpool Character Details to Pikachu
With the figure baked, I then marked out with my sculpting tool the areas where I would add finer details like cuffs, gloves, knee pads, belts, eye patches and more.
Marking out makes it easier to create the right-sized parts to add into place beforehand.
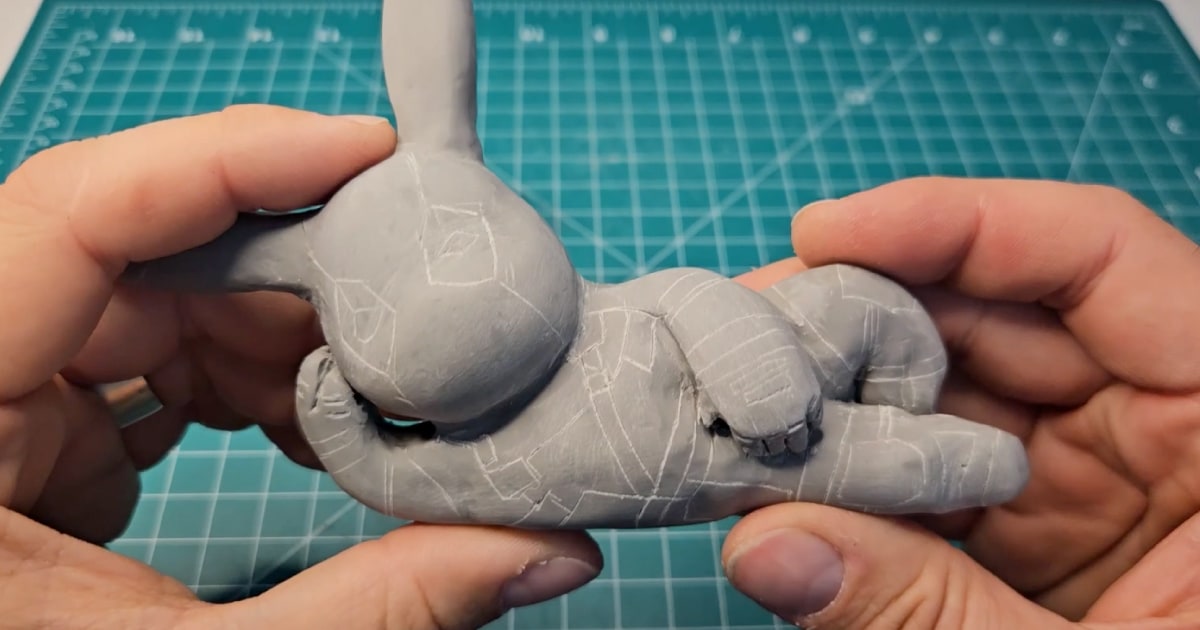
The first detail I added was the cuffs around the gloves. I rolled out the clay flat and added the line detail before adding it to the figure. I then cut to the size of the figure where appropriate.
I then moved on to adding the finer details. I created padding for his gloves, cross-body strap with buckles, throwing knives, and belt and decided to add some extra clay to define different areas of his suit.
Making these small enough and with enough detail was tricky, so if you’re trying to recreate them, you will need patience and a little time.
Pikapool has all the Accessories
This Pikapool figure is one of the most detailed I have created to date in terms of accessories and finer details.
Making buckles, pouches, straps, the Deadpool belt buckle, pistols, and his katanas with back carriers requires finesse, and with my big chunky fingers, that’s not always easy to do, which is where your tools will come into play.
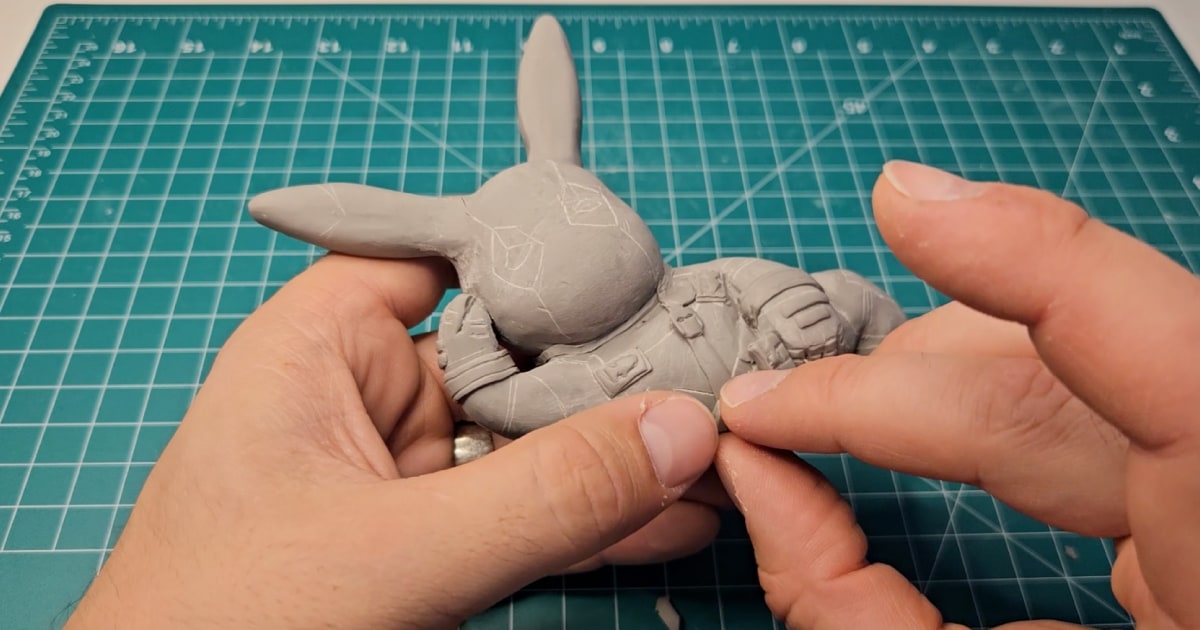
Using finer-tipped sculpting tools to add the details, like miniature figure creators do, and tweezers to add the final parts to the sculpture saves ruining the final result by squidging them.
Once everything is attached, it’s back in the oven for a short 15-minute period at 130C to cure the clay accessories to the overall model.
After baking, it’s on to paint.
Adding the Iconic Deadpool Colours To Pikapool
After cooling, it was time to paint Pikapool. To make it easier to handle while painting, I created a small wooden base, drilled two holes, and glued 3mm armature wire into them.
I then used some super glue to stick Pikapool onto the wire to hold him steady while I painted.
To begin painting, I gave him a base coat of black acrylic, which would help deepen the red colour that I applied to the top.
After the black was dry, I painted the appropriate areas of his suit, including his face mask, blood red. After the first coat, it looked like my five-year-old self had been having a go at painting.
But after a few more coats, my ten-year-old self emerged, and that was kind of the level it stayed at. Painting is not my forte, but at least I try.
With the main colours blocked out, I then added brown details to his belt and pouches, coloured in his Deadpool logo buckle, and added some metallic gunmetal grey to his guns before moving onto his white eye patches in his face mask.
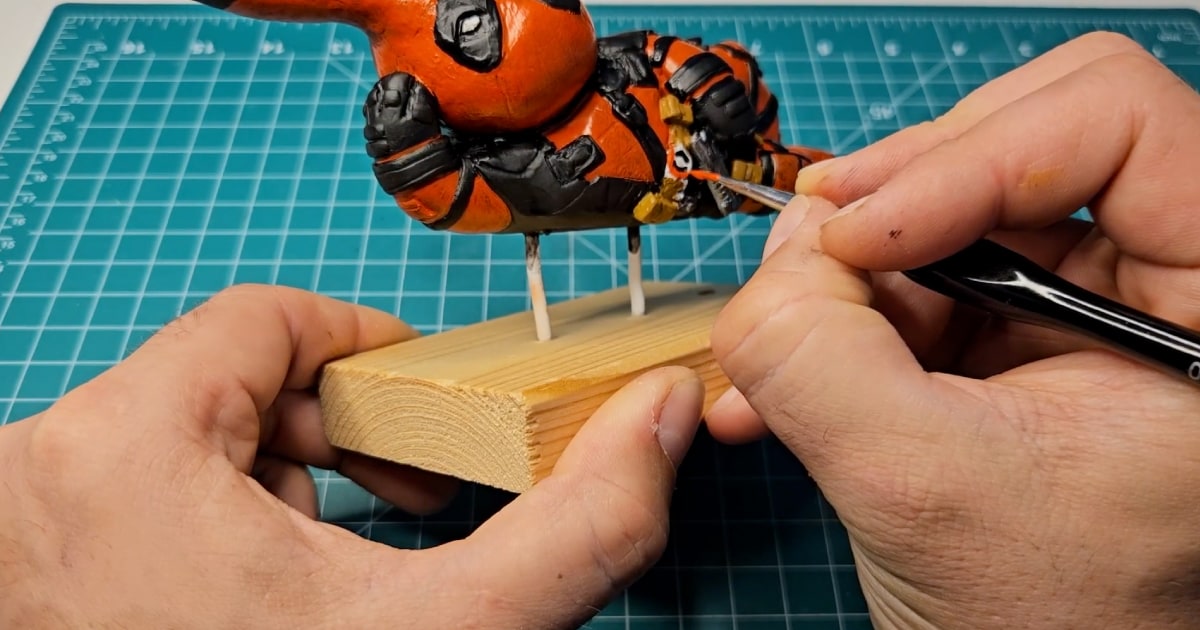
To add depth to the figure, I applied a light black acrylic wash over areas of his suit to make them look worn and dirty, dabbing off any extra wash that wasn’t needed with a kitchen towel.
A few highlights of white acrylic were lightly dry brushed onto the light-catching areas, and the model was complete.
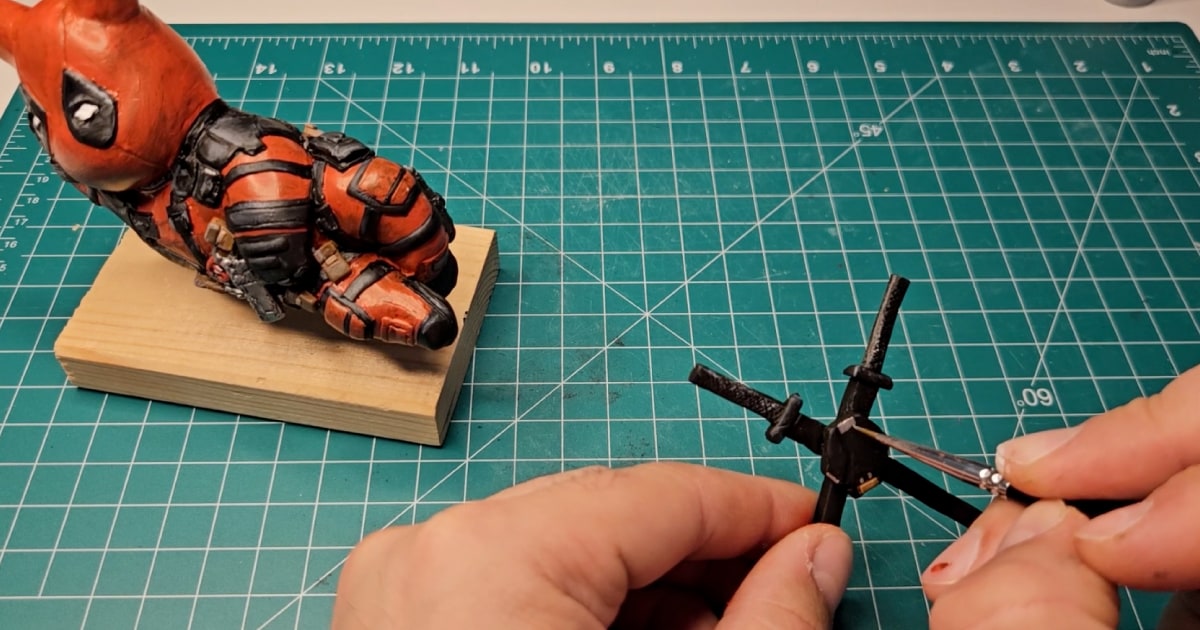
Pikapool Is Born!
Now that Pikapool was all painted, it was time to cut the metal armature wires down to size so that it looked like Pikapool was lying on the wooden board.
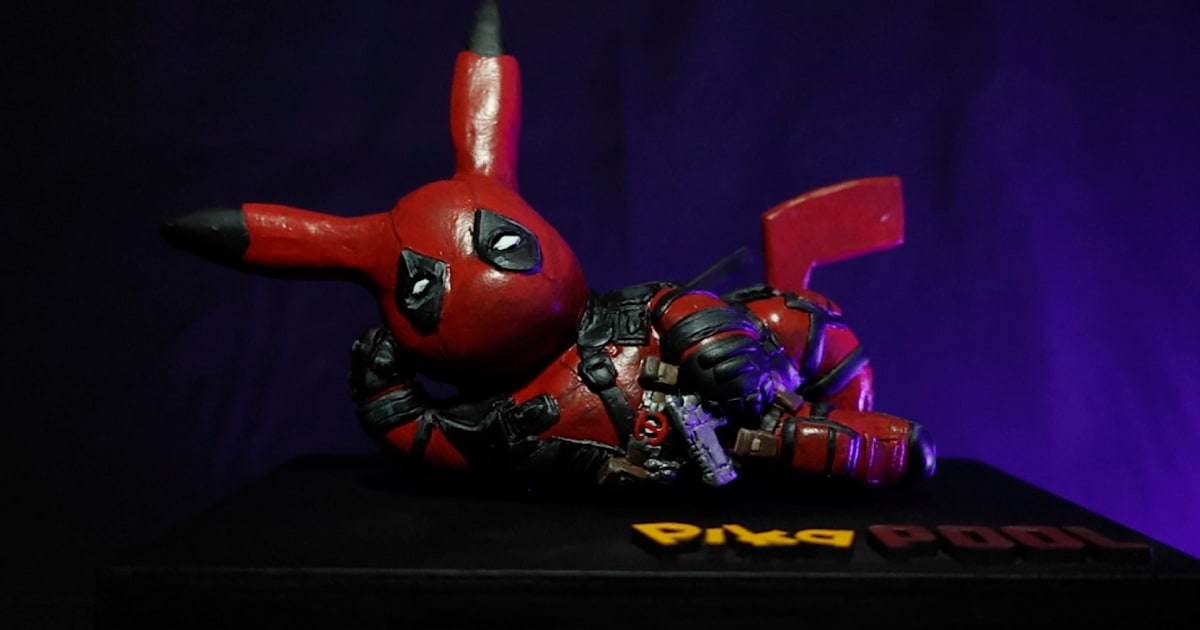
I then painted the wooden base matt black and laid Pikapool on it to achieve the final result.
To give this model a last touch, I laser cut a custom Pikapool logo out of 3mm wood and painted it the appropriate colours: yellow on the Pika and red on the Pool.
I then glued this logo into position on the base to reveal what you see in the image below.
Watch More Videos & Have a Go Yourself
I hope you enjoyed this tutorial on how to create the fictional character Pikapool; I certainly enjoyed creating it.
If you’re looking to get into polymer clay sculpting, I suggest you just give it a go. It doesn’t matter if it takes you a long time, or if it doesn’t go right the first time.
Until you bake polymer clay, it won’t harden so you can always squidgeroo it all together again and start over. Just be sure to keep it free from dust by wrapping in cling film.
Don’t forget to check the video and my other videos here on NoLimitNerd.com or on my YouTube channel first where you’ll get to see the videos first.
Please tell your friends, family and strangers to subscribe to help me grow my channel, and like and comment to let me know what you might want to see next.
Tools I Used
Heads up. Some of these links are affiliate links if you click on them and buy something I might make money which will help you support NoLimitNerd at no extra cost to you.
Sculpting Tools
- Super Sculpey
- A2 Cutting Board
- Pasta Maker
- Sculpting Tools
- Modelling Tools
- Vinyl Gloves
- Armature Wire 3mm
- Super Glue
Painting Equipment
Filming, Audio & Tech
- Cannon EOS R8 Camera
- Cannon RF 50mm Camera Lens
- Lexar 128GB SD Card
- Softbox Lighting with Diffuser
- Camera Tripod Ball Head
- NEEWER Led Lights
- Fifine Microphone (USB)
- Black Backdrop Cloth
- Microphone Arm – for Overhead Camera
