DIY Gengar Pen Holder: The Pokémon Desk Accessory You Need
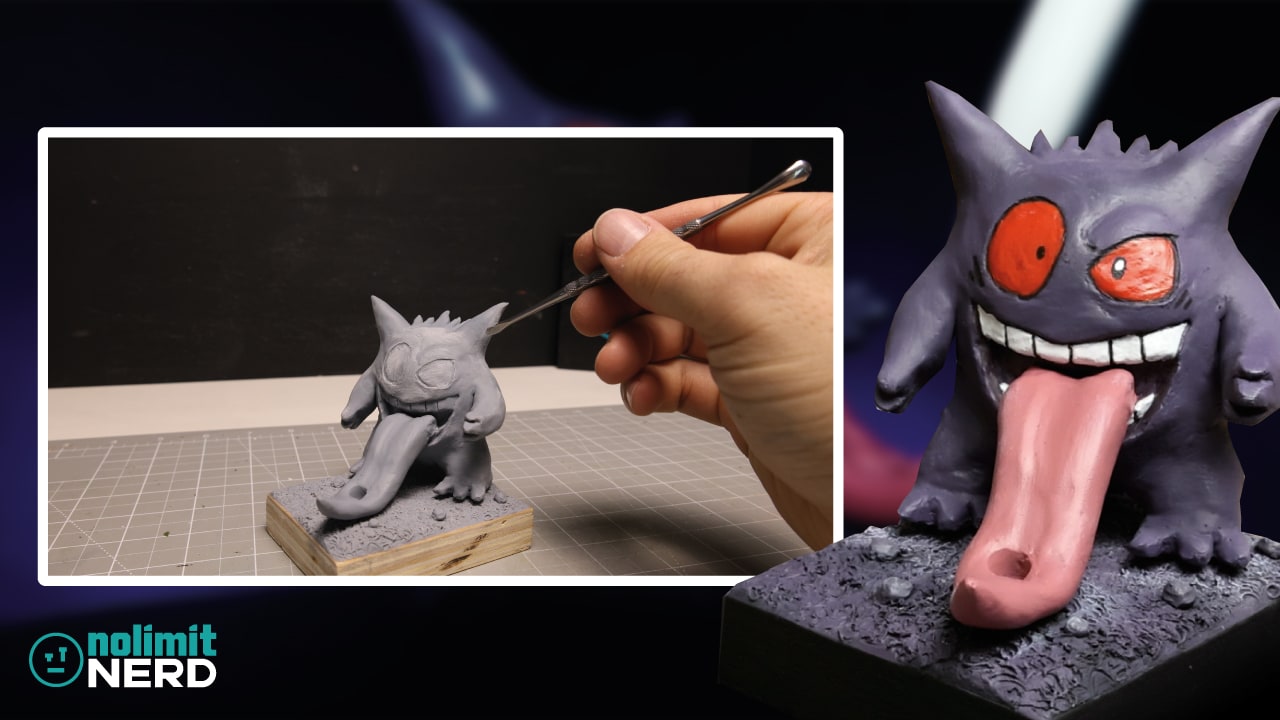
Gengar, the mischievous and lovable ghost Pokémon, has floated into countless hearts—and now, onto your desk! In this tutorial, I combine art, functionality, and fandom to create a unique Gengar pen holder entirely out of polymer clay.
Whether you’re a die-hard Pokémon fan or a DIY enthusiast looking for a fun new project, this creative accessory is the perfect way to add some spooky charm to your workspace.
Let’s bring Gengar to life in a whole new way!
Setting Up The Project – Materials & Preparation
Like most of my new creation projects, I start with a little bit of preparation, and I mean little. Typically, I’ll do some last-minute research to get an idea of what I’m going to create, maybe do a little sketch and then let the rest figure itself out when I’m sculpting.
However, if you want to be a little more prepared than me, then you’ll want to get as many reference pictures as you need to cover different angles of what you’re making. In this case, I used some pictures of Gengar from the Pokemon series and some other vinyl toys that have already been created by others.
I then give my desk a quick wipe down to remove dirt, dust, and old clay that’s stuck to my cutting board and set up my camera ready for filming. Of course, you can skip that last step if you’re not going to film the whole thing, which is a lot more work than you might think.
It’s then time to collect my materials, in this case, Cosclay, which I condition into flat pieces thanks to my handy Pasta Maker. Trust me, it’s a time and hand-saver. Unless you like to work on your grip strength, you’ll want one of these.
I grabbed some tin foil from the kitchen drawer, put my tools to the side, and was ready to start sculpting my one-of-a-kind Pokemon pen holder.
Sculpting Gengar’s Body and Head
I start much like I did in my Pikapool video by creating a ball of tin foil, scrunching it up nice and tight, and then covering it with a thin layer of Cosclay. This helps to minimise the amount of clay I use, saving me some money.
I then roll the whole thing into a ball and put it aside. I then take two chunks of clay, roll them into balls, and roll each one into a point to form Gengar’s ears. These are then attached into position using my silicone brush to help blend the joins together.
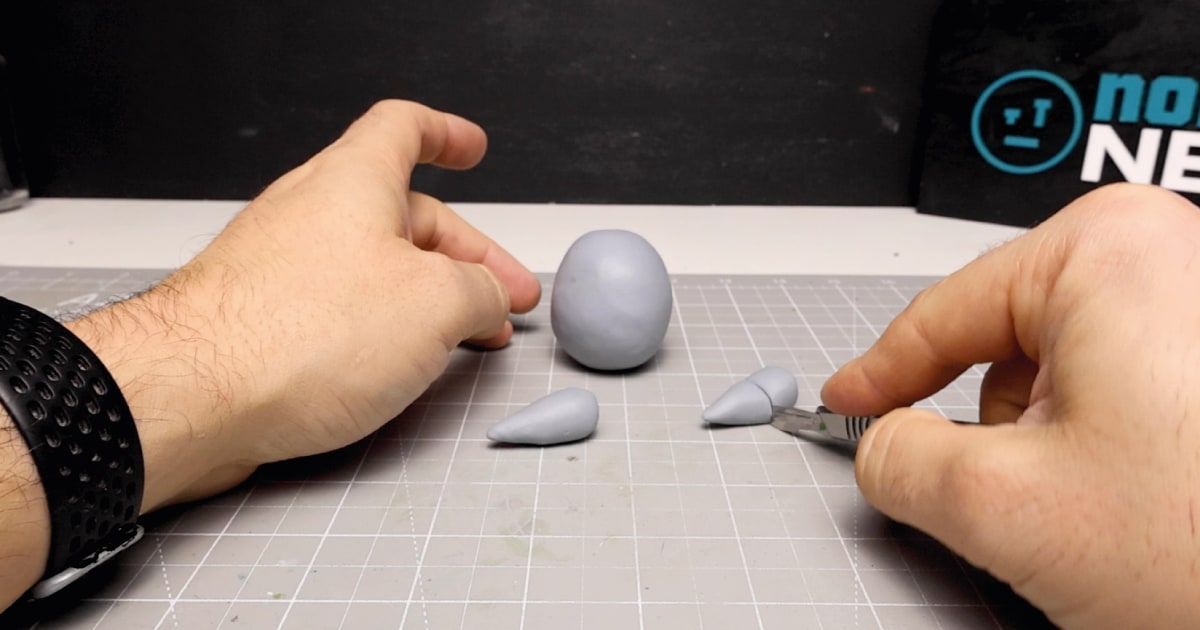
With the ears attached, I move on to his arms. I roll some clay into thick worms and shape them into something like Genagar’s chunky arms. With each made, I squidge them into position to the side of the bigger ball I made earlier.
It was then on to Gengar’s legs, which are basically just thick, short worms of clay. I rolled them and cut them to size, then added them much in the same way I did the ears and arms, making sure to blend them in, giving them some contours and shape.
With the main parts attached, you can see Gengar’s basic shape come to life.
Adding Gengar’s Toes, Haircut and Hands
As Gengar is one big head-type body, it was one of the easier Pokemon to try to create.
To add details to my basic shape, I rolled up some small balls of clay and shaped them into flat cones. I added each cone individually, three to each leg, and blended them in accordingly.
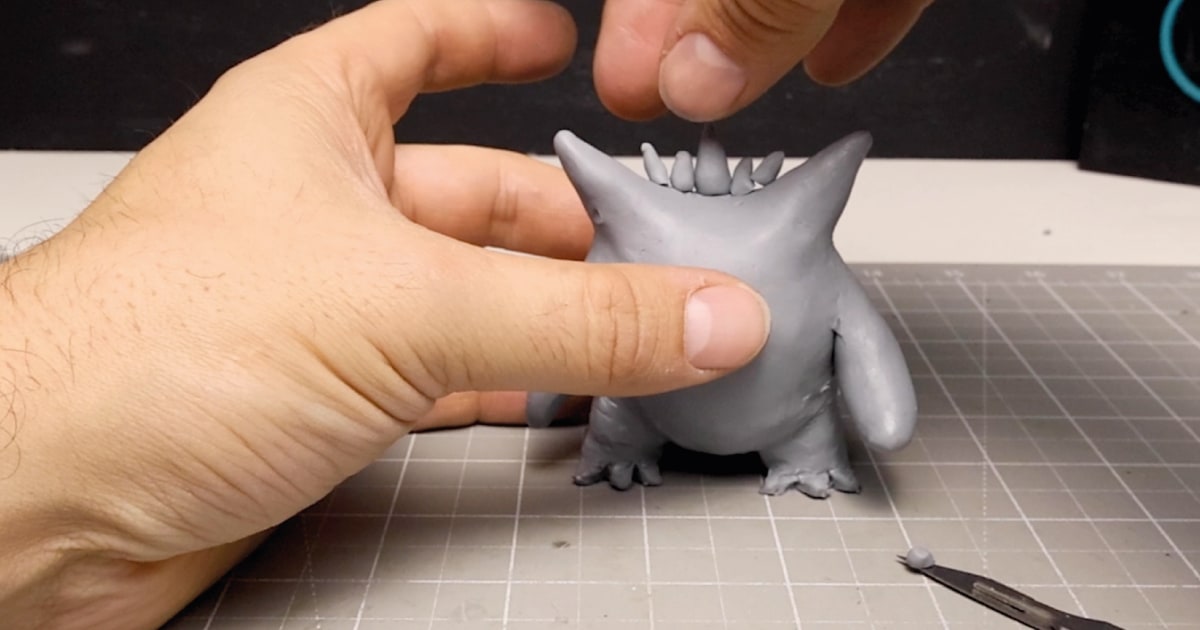
It was now time to give Gengar a quiff. I rolled out some worms, ensuring they were pointy at one end. I made a few different sizes and attached them from the shortest near his ears to the longest in the middle.
This completed Gengar’s haircut, but there are still a lot more pointy wormies to create later.
Before moving on to the other spikes needed, I made two slits in each of Gengar’s arms and used my silicone brush to shape them into pointy fingers softly.
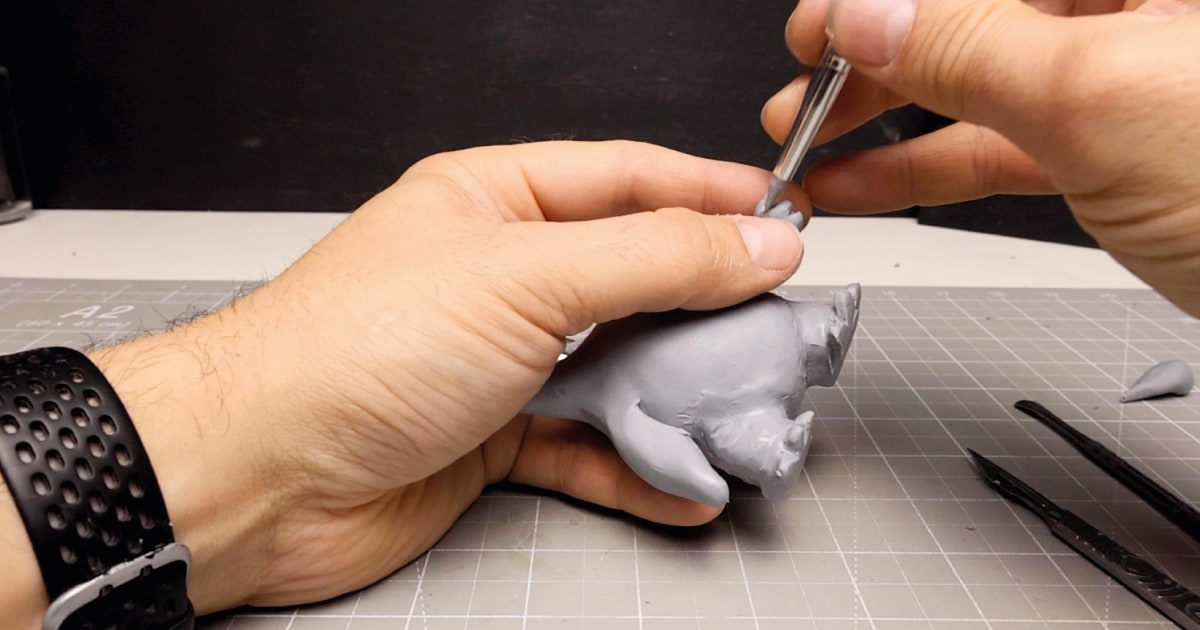
With this complete, I then turned my Gengar figure around and worked on adding his tail. I rolled some Cosclay into a thick wormy, shaped it into a soft point at one end, and cut it to size. I then gave it a squidgeroo into place at the bottom of his back and worked the clay together using my chubby fingers till it was all blended.
Making Gengar Smile
With most of the major details done, I turned my focus to his face and outlined Gengar’s most common expression, a cheeky yet sinister grin.
I used my metal sculpting tool to outline his eyes and where his mouth was to be and then carved out a big, wide hole for it. I did manage to hit the ball of tin foil I used as the centre, which I then shaped some more and put a thin layer of clay back over the top to cover it up.
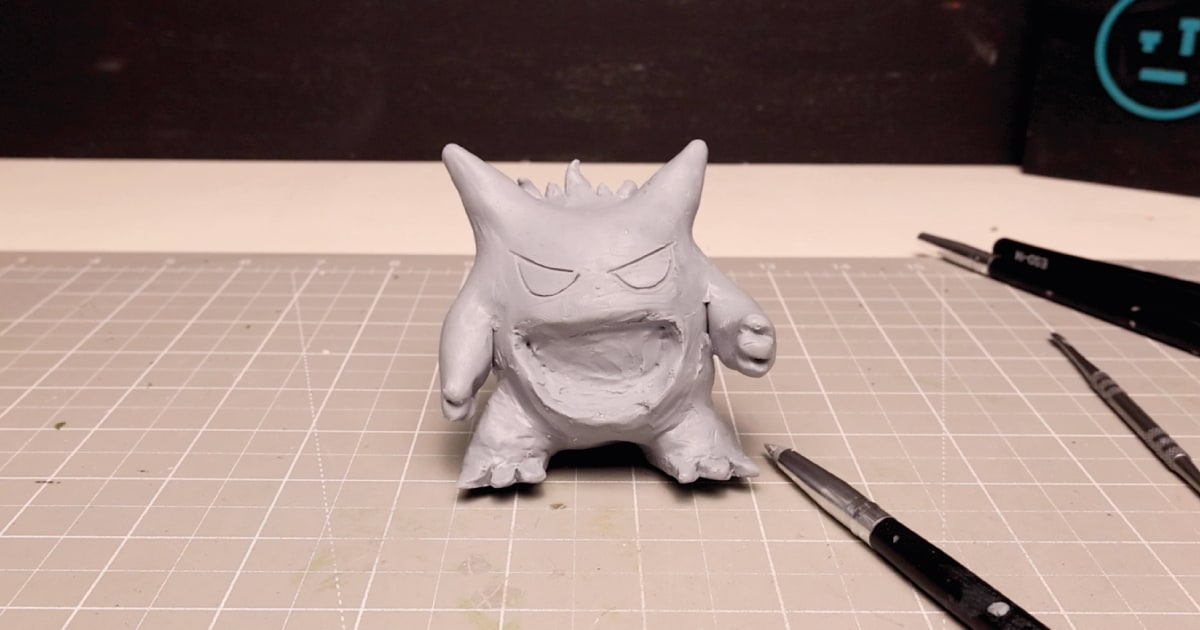
With the mouth opening created, I cut two thin strips of clay, one to use as the teeth at the top and one to use as the teeth at the bottom of the mouth. I blended the clay into the sides of the mouth and outlined the shape of the teeth using my tool.
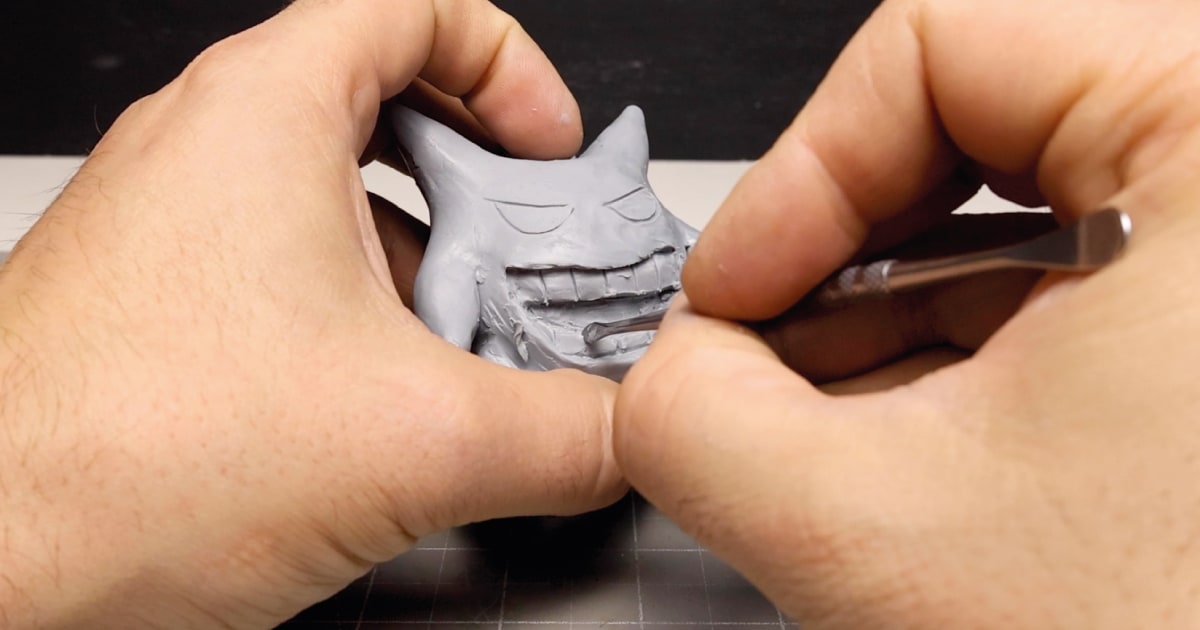
The last thing needed to finish Gengar’s mouth was his long tongue. I rolled out a thick worm of clay before flattening it a little and making it pointy at one end. I then test-fitted it to see if it would fit between the two rows of clay teeth I had added earlier before curving the tongue to make it look a little more devilish.
To secure the tongue to the body, I added some 1mm armature wire, which I had twisted together to give it more strength, and then inserted it into the non-pointy end of the tongue. This was like how I did the Alien Xenomorph Angler Fish inner jaw.
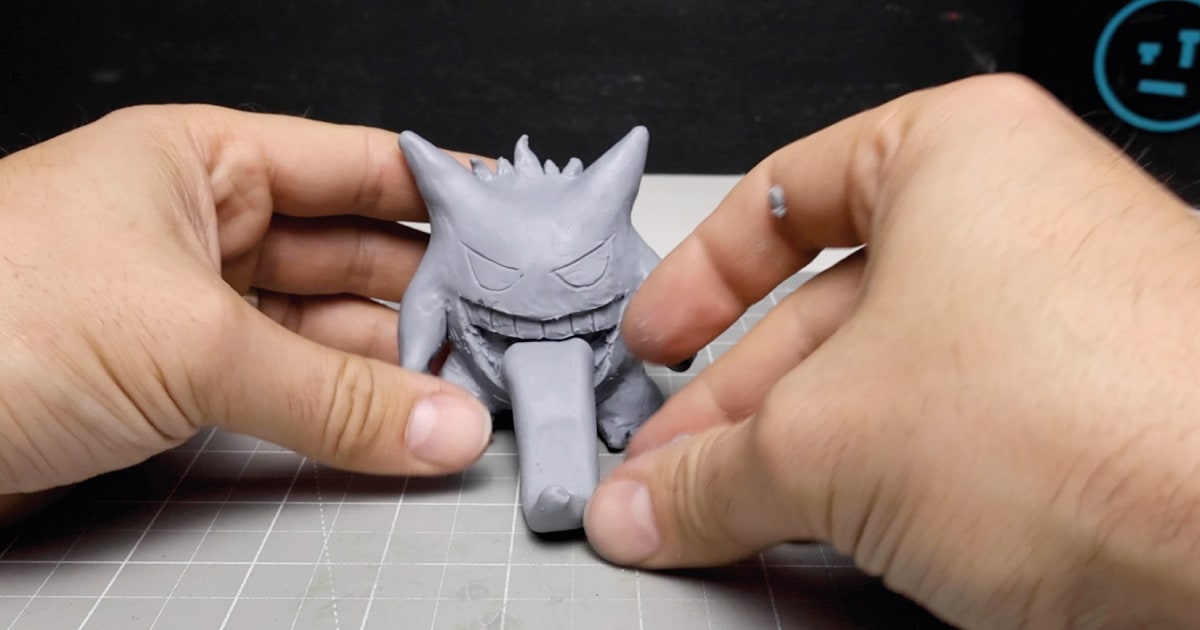
Finishing Off with a Few Distinct Features
With most of Gengar’s frontal features complete, I turned him around to work on some of his distinct features, such as the rows of spikes protruding from his back.
I rolled out a sausage of Cosclay, which I made pointy at one end when rolling. I then cut the spikes to size and added them to position on his back. With all the spikes in place, I used my ball-ended sculpting tool and silicon brush to blend them into his back.
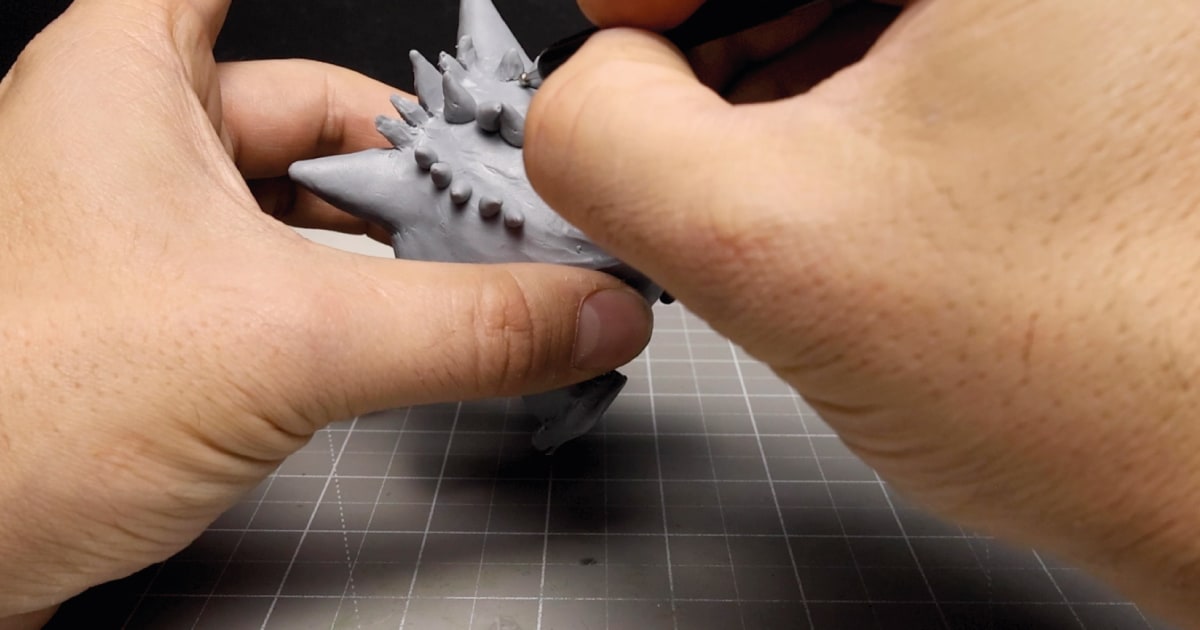
Top Tip: If I were to make Gengar again, I would have pre-baked his spikes before adding them into position for a cleaner look.
Changing Up Gengar’s Expression
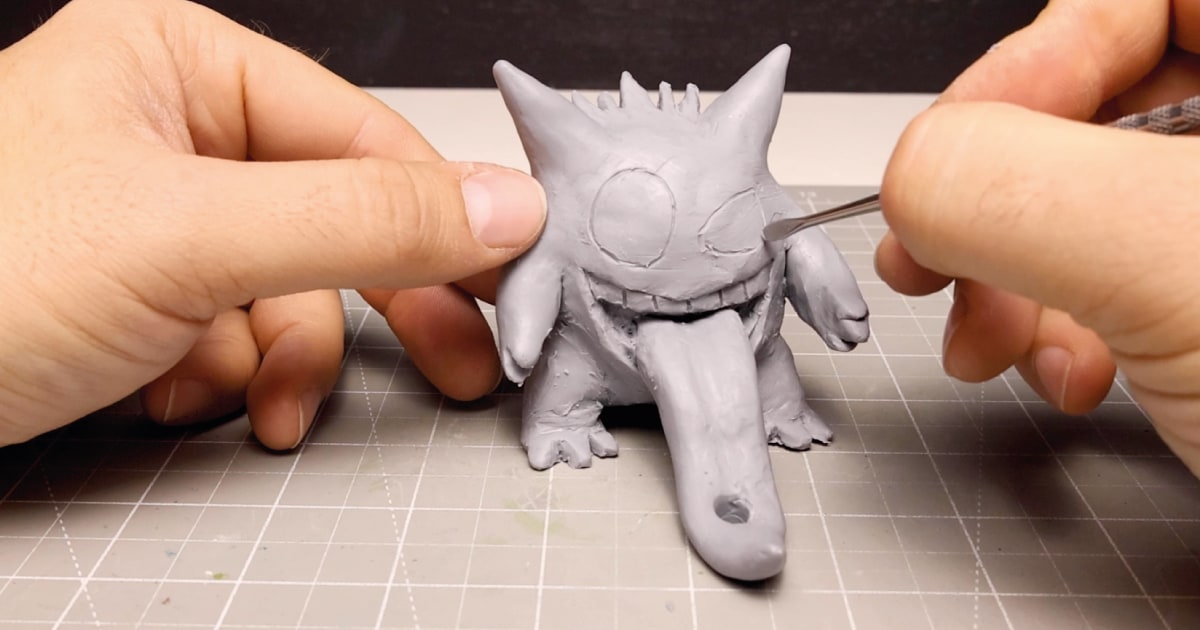
I wasn’t happy with the typical base Gengar expression on many of the Gengar toys, especially since this guy is going to have a pen jabbed into his tongue, causing him extreme pain.
So, I smoothed off the clay to remove the base expression I had already added and then added his new expression with my metal sculpting tool. With his eyes outlined, it was time to move on to the base and other little bits.
Making The Base
Anyone with a piece of wood and some clay can make the base for this mini Gengar Diorama. First, you take an 18mm piece of plywood you have lying around, cut it into a small rectangle, and then cover it in clay.
It’s that simple. The clay took a little time to stick to the wood, so you might want to rough up the wood first or score it a little before adding the clay. This helps it grip the wood and form a base from which to put your Gengar figure.
Unfortunately, the tongue wasn’t thick enough to hold my digital pen alone, so I added some clay under the tongue at one corner of the base. I then positioned Gengar on the base and made a hole through the tongue and into the base which when baked would hold the pen nice and steady.
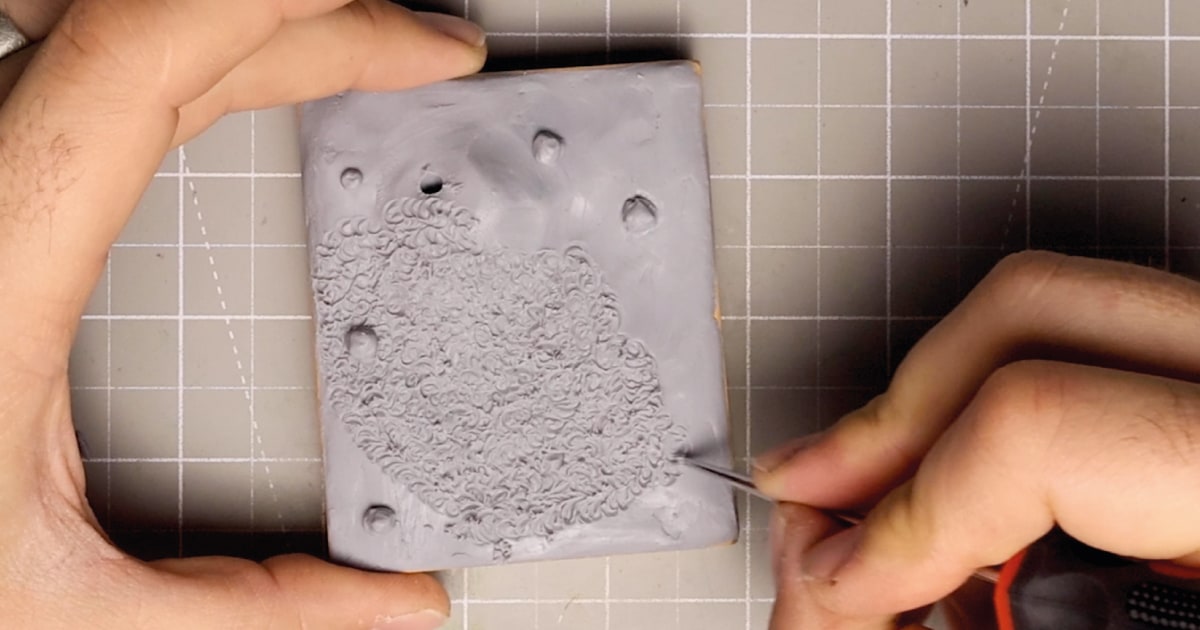
To finish off the base, I rolled up a few balls of clay and shaped them into rocks when on the base using my silicon brush. I then wanted to give the ground some grass like texture.
To do this, I took a pointy metal tool and lightly pressed it into the clay in a small, tight, swirling motion. This created a unique texture that contrasted the smoothness of my Gengar figure and, when painted, looked pretty good, if I do say so myself.
Because any Pokemon figure or diorama wouldn’t be complete without a Pokeball, I made one to add to the base using a rolled-up ball of clay. I then added the specific details using my sculpting tool and a selection of round cutting tools.
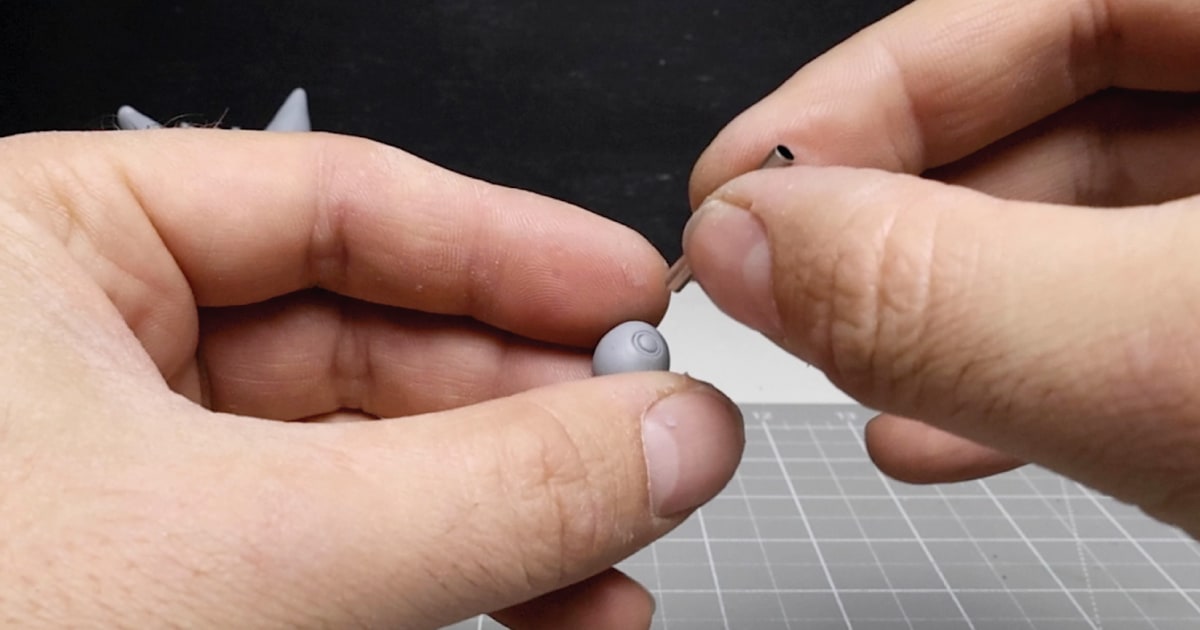
Before painting, I gave Gengar a facial using Isopropanol Alcohol. I gently brushed it on to the clay figure, which slowly melted the clay a little, helping to smooth out the clay and remove any fingerprints or unwanted tool marks.
Baking Gengar
With my Gengar Pen Holder complete, I baked the figure and base according to the instructions on the Cosclay packet, which is to bake for 30 minutes at 275F or 135C per 1/4 inch (6mm) of clay.
In this case, I baked Gengar for just over an hour or so to ensure that the fattest parts of his body, arms, and legs were baked enough. Just be careful not to overbake, underbake, or bake at too high a heat to ensure that your figure remains flexible and doesn’t go brittle.
Top Tip: If you can’t set your oven temperature precisely because you’re using a gas oven, an oven thermometer is a great cheap option to ensure you get a good bake every time.
Painting Gengar – Base Coat & Colour Blocking
With the base and the figure now baked to perfection. I set my sights on painting them both.
As I had no primer to hand at the time, I gave both my model Gengar and the base a light airbrushing with thinned-down black acrylic paint, which set me up with a good base to start adding colour to.
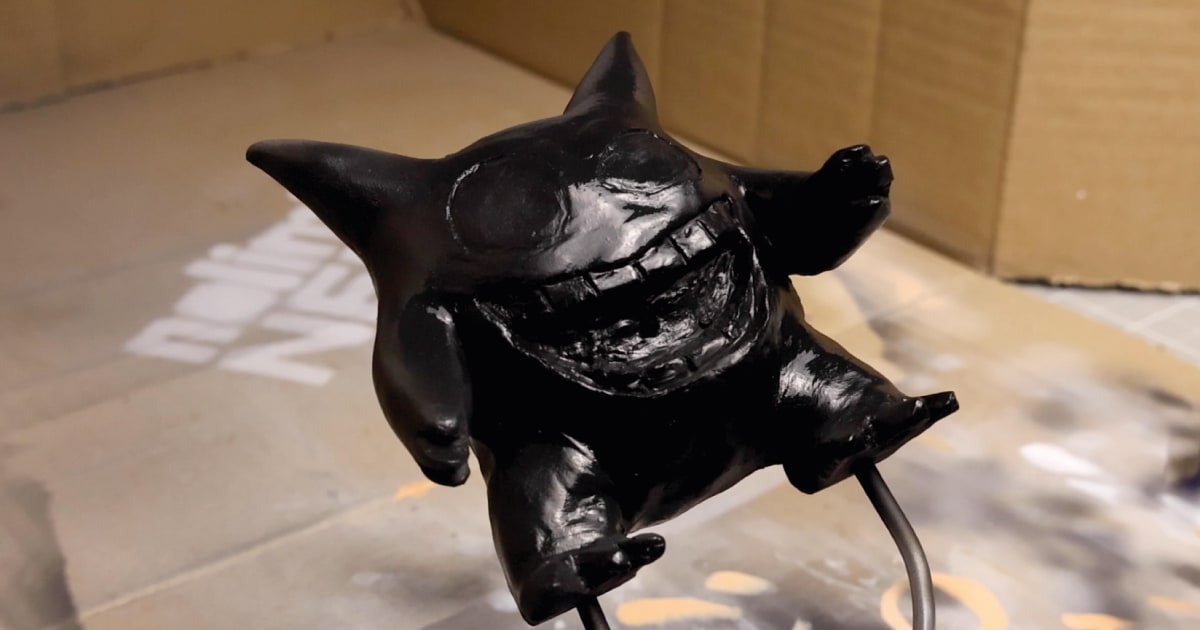
Top Tip: In the future, I’d suggest, if you have time, using Vallejo black primer, which shrinks as it dries, ensuring any finer details are still visible. The only downside to this is that it has a 12-hour cure time.
With the base coat dry, I turned my attention to his mouth. I removed the tongue and painted his inner mouth a light pink colour, which I added a little purple to later.
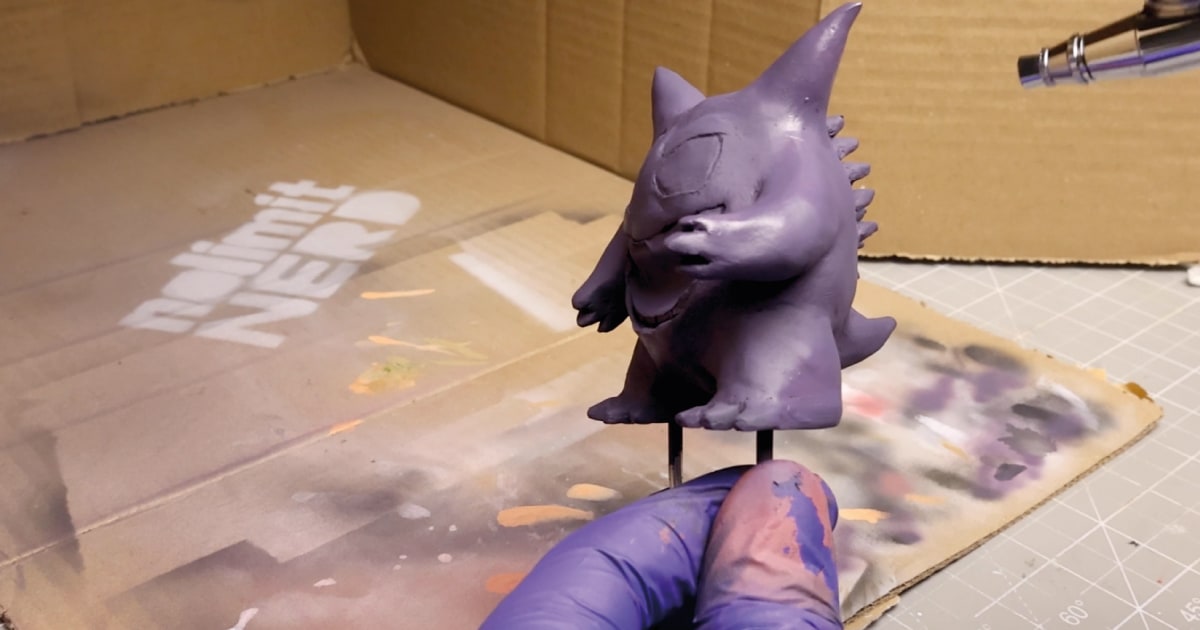
I then masked off his mouth with masking tape. You could use masking fluid for more precise coverage of finer details in your models. With the mouth masked up, I mixed up a purple colour as close to Gengar’s original colour as I could find and then airbrushed his body to give it a smoother look.
Adding the Finer Details
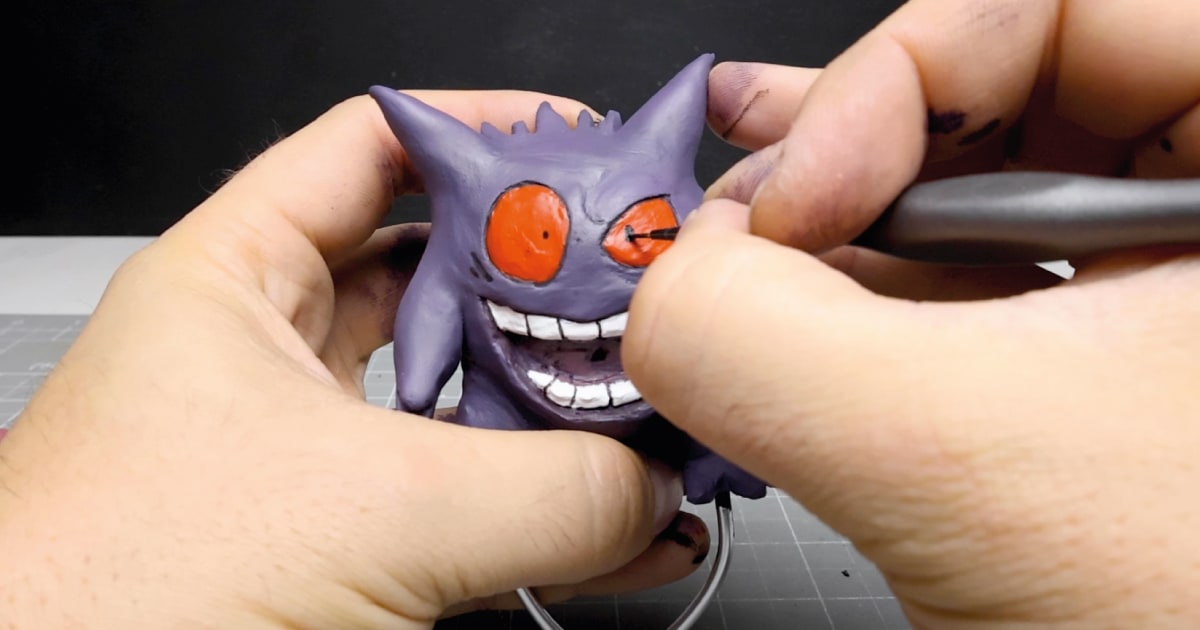
After painting the body, I painted his teeth bright white and added a few black details around his eye sockets and the areas between each tooth.
I then painted his eyes using blood red acrylic, the same red I used for the Toadstools in my Evil Toad from Mario Diorama, before adding his pupils in black acrylic. I added a white highlight to one of his eyes and painted his tongue in a bright pink colour to contrast the dark purple of his body.
I then gave everything a few highlights using white acrylic on a dry brush before painting the base.
Painting The Base
For the base, I used the same black acrylic as a base coat before using my dry brushes to add some dark purple patches, with white highlights for the grass-type areas as this scene is set at night.
I painted the rocks greyish with a slight purple light and blended it all together. It was one of the simplest bases I had made using clay, and I think it turned out okay in the end. What do you think?
Making Gengar Shine
With my Gengar figure painted, the tongue attached, the base painted, and my Pokeball colour correct, I assembled it all together and gave it a quick gloss coat using my airbrush.
Adding a gloss acrylic varnish coat to the acrylic paint helps protect it from water damage and chipping, and if you use a UV varnish like I do from the acrylic discolouring in the sunlight.
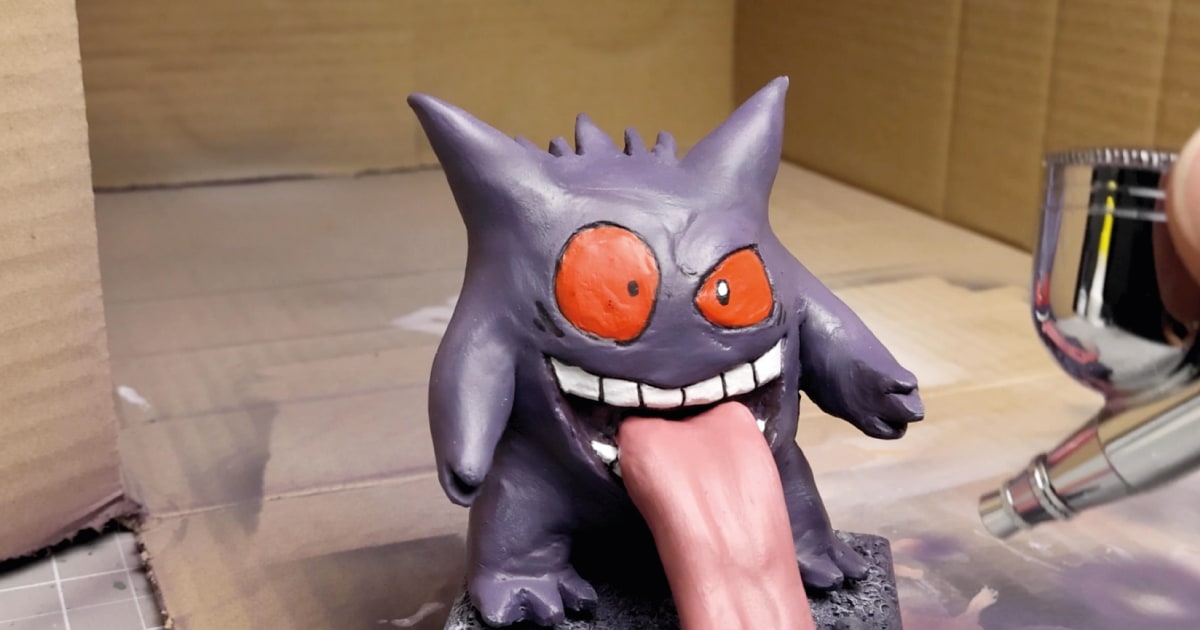
To complete the model, I then added some uv resin to Gengar’s eyes and tongue to make them glisten even more, and I used a few drops of resin around his brow as sweat beads and on his tongue around where the pen is poking into it as saliva drops. You then use your UV light to cure the resin before it runs everywhere.
With everything now finished, it was time for the final reveal.
My Pokemon Pen Holder – Gengar Version
This whole model came about because I wanted a unique way to hold my digital Meta Pen, which I used to doodle with occasionally. This Gengar figure combined my son’s love of Pokemon with practical use, making it a must-have desk accessory for any Pokemon fan.
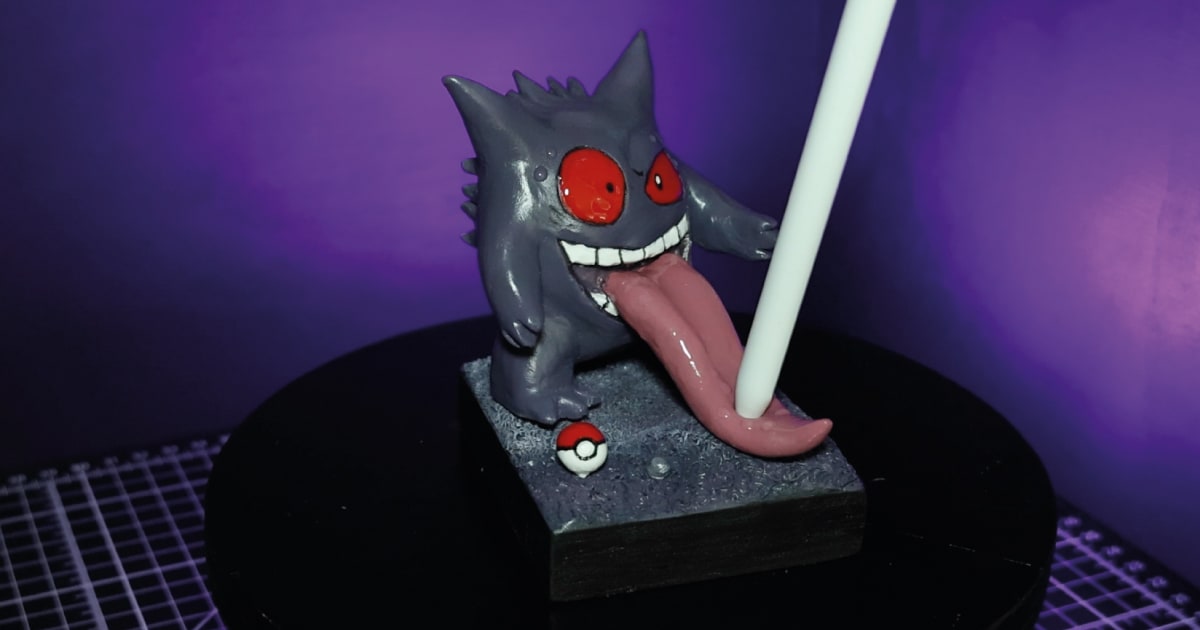
It’s easy to recreate, doesn’t take too long to build or paint, and you can customise it to hold any pen or pencil you like before baking. Even afterwards, you’ll find that it can still hold any standard-sized pen.
I hope you’ve enjoyed learning how to make Gengar. Don’t forget to head on over to my @NoLimitNerd YouTube channel for all the latest videos, and leave a comment on the video if you want to get in touch. I check that more regularly than anything else at the moment.
Don’t forget to watch my other videos, like my how to make a custom bobblehead and, most of all, enjoy sculpting.
Tools I Used
Heads up. Some of these links are affiliate links if you click on them and buy something I might make money which will help you support NoLimitNerd at no extra cost to you.
Sculpting Tools
- CosClay
- Green Stuff
- A2 Cutting Board
- Pasta Maker
- Sculpting Tools
- Modelling Tools
- UV Resin
- UV Light
- Vinyl Gloves
- Armature Wire 1mm
- Armature Wire 3mm
- Super Glue
Painting Equipment
- Paint Brushes
- Acrylic Paints
- Valejo Airbrush Thinner
- Air Brush Kit
- Air Brush Cleaner
- Gas Mask
- Acrylic Gloss Varnish
Filming, Audio & Tech
- Cannon EOS R8 Camera
- Cannon RF 50mm Camera Lens
- Lexar 128GB SD Card
- Softbox Lighting with Diffuser
- Camera Tripod Ball Head
- NEEWER Led Lights
- Fifine Microphone (USB)
- Rotating Display Turntable
- Black Backdrop Cloth
- Microphone Arm – for Overhead Camera
- Metapen
