Evil Toad: Unveiling the Dark Side of Mario’s Mushroom Kingdom
What if Toad had a sinister side? Meet Evil Toad, the Mario villain you never knew you needed! In this post, I’ll take you through my process of crafting a diorama that brings this dark and twisted character to life—all made entirely from polymer clay.
From shaping the tiniest details to adding those final creepy touches, this piece is a unique blend of creativity and craftsmanship. Whether you’re a Mario fan or just love random art pieces, you’re in for a treat!
Preparation is Key: Materials, Tools & References
Before I start most of my projects, I grab some reference pictures to give me an idea of shape, size and features that I might want to incorporate into my clay models.
To do this, the tinterwebs is the quickest and easiest way unless you have a toy figure or something physical to hand that you’re trying to recreate with your own twist.
After I’ve finished my research, it’s time to make sure my polymer clay tools are clean, and my work surface is free from dirt and dust. If you forget to do this step, all that dirt will stick to your clay, potentially ruining your piece.
If you’re using polymer clay like Sculpey or Cosclay, you’ll want to condition your clay before you start. This typically means squishing it in my hands until it forms a softer round ball and then squidging it through my Pasta Maker to create clay sheets that are easier to wrap around any tin foil armatures.
So, with a clean work area, all the tools, paintbrushes, reference pictures, and conditioned clay, it’s time to start sculpting your own DIY Evil Toad Diorama.
Sculpting Toad from Mario with an Evil Twist
As I did in my How to Make Beetlejuice Bob video and Pikapool clay figure, it’s time to create a tin foil ball. Simply grab some tin foil and squish it into a ball.
Then, you can wrap that with your pre-made sheet of clay and give it a squidgeroo to form the body of the Toad. After that, you’ll want to shape the clay to the Toad’s body shape before repeating the process a little later with a smaller ball of tin foil and clay for the Toad’s head.
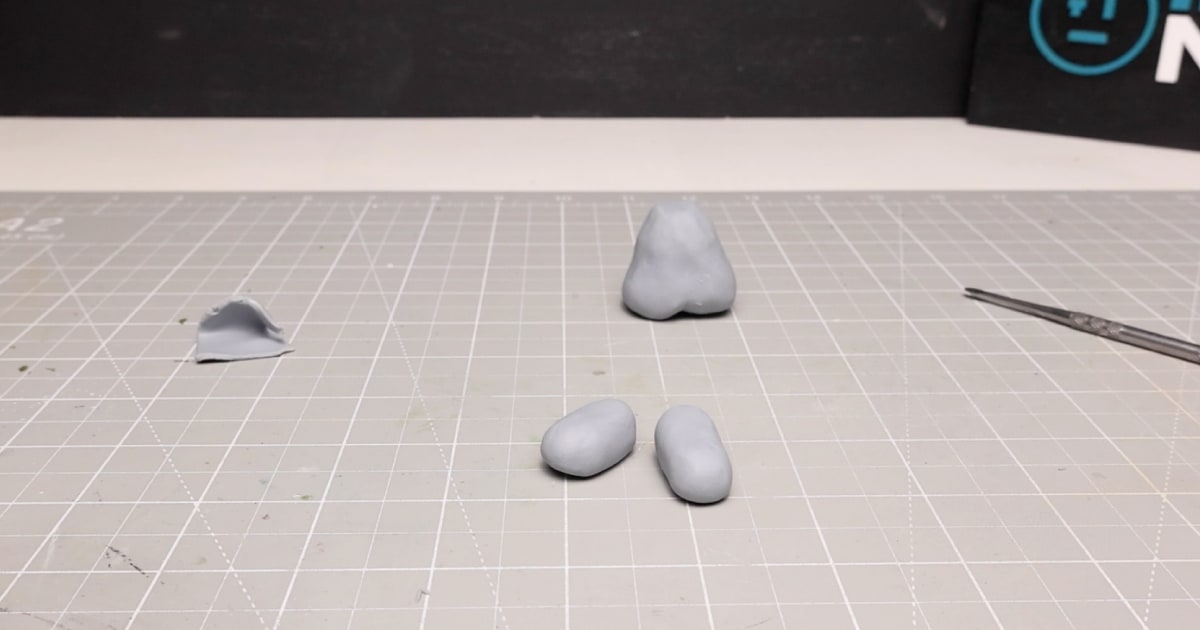
Before moving on to making Toad’s head, I decided to create his feet. I rolled out two pieces of clay into the shape of Toad’s shoes and added them to the bottom of the body using a 3mm armature wire.
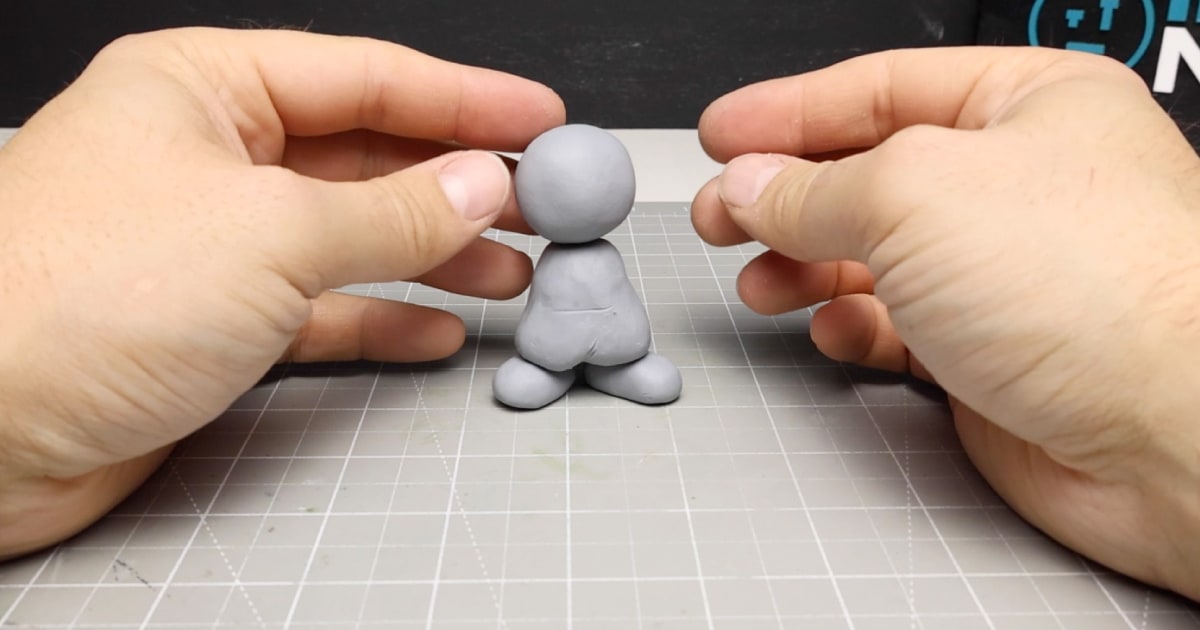
With the Toad’s body, shoes, and head roughly shaped, it was time to make the Toad’s Mushroom Cap.
Sculpting The Mushroom Cap /Hat
To make Toad’s unmistakable hat, I rolled up a ball of clay, making sure it was larger than the ball I had already rolled for the head, and gave it a squish in the middle.
With the cap squished, I got to work hollowing it out to insert Toad’s head into it. I shaped it using the head ball for reference until I was happy with its look.
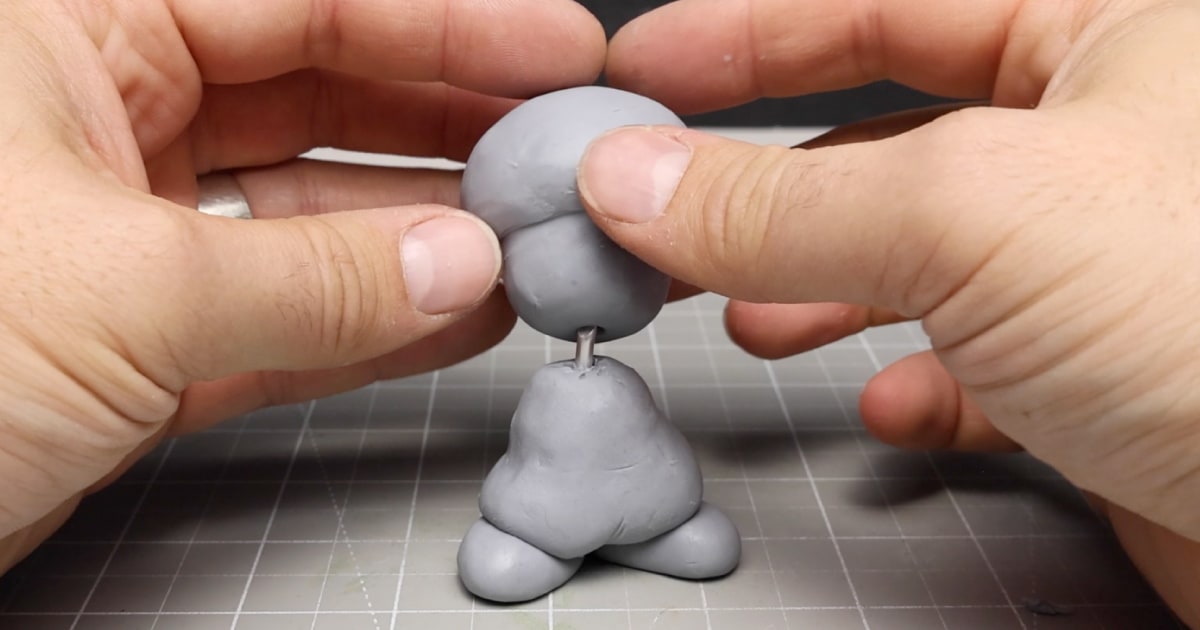
When I was it was time to add it to the body, which I did using my trusty 3mm armature wire pressed into the body and then inserted the head on top.
Adding Arms to the Body
It was time to add Toad’s last appendages to his body. I used 3mm armature wire shaped to form a pose and then wrapped them in Cosclay to give them the bulk they needed. These were then bonded to the main body by squishing the two clay pieces together, adding rigidity to the structure.
Little did I know that later on, I would have to redo at least one of his arms all over again. The reason is that they just looked all wrong, and no sanding or smoothing of the clay made it look right. So, in keeping with this evil diorama, I ripped off his arm once it was baked and started all over again.
Top Tip: Don’t be afraid to start pieces over or change things later; just cause it’s baked doesn’t mean you can’t add or remove bits to make the final piece look better.
Toads Waist Coat & Hands
With Toad not yet baked, I rolled out a thicker sheet of clay and used my scalpel knife to cut it into the shape of a rudimentary waistcoat.
With the waistcoat cut, I then tried to wrap it around his clay body before tidying up the edges around his arms and neck and moving on to his hands.
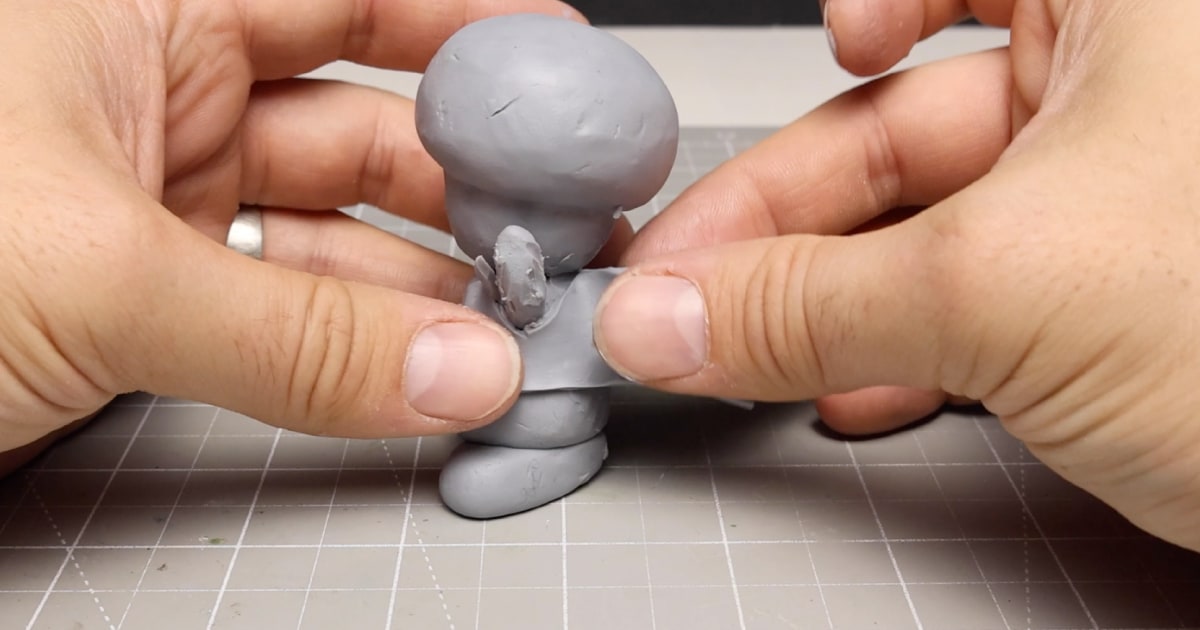
Top Tip: Even though I forgot to in this sculpture, you can use material gently pressed into the clay to add texture to it, giving it a more realistic effect.
To make his hands I simply added some blobs of clay to the end of the arms I had already created, and then made 4 slices into the ball to form bare fingers. This wasn’t the greatest idea, and if I were to do it again, making small sausages and adding them individually would make for a better result.
Adding Details: Frying Pan, Eyes & Finer Details
With the bulk of Toad roughed out it was time to start creating some accessories and adding the finer details.
I started by putting Toad aside and making a frying pan to add to the overall evil Toad diorama feel.
I started with a small worm of clay cut to length. I then used my circular clay cutter as a mould to make the main area of the frying pan, as it was the right size and trimmed off the excess clay. I then added a hole in the handle for hanging and put it aside to bake with the circular cutter still in place.
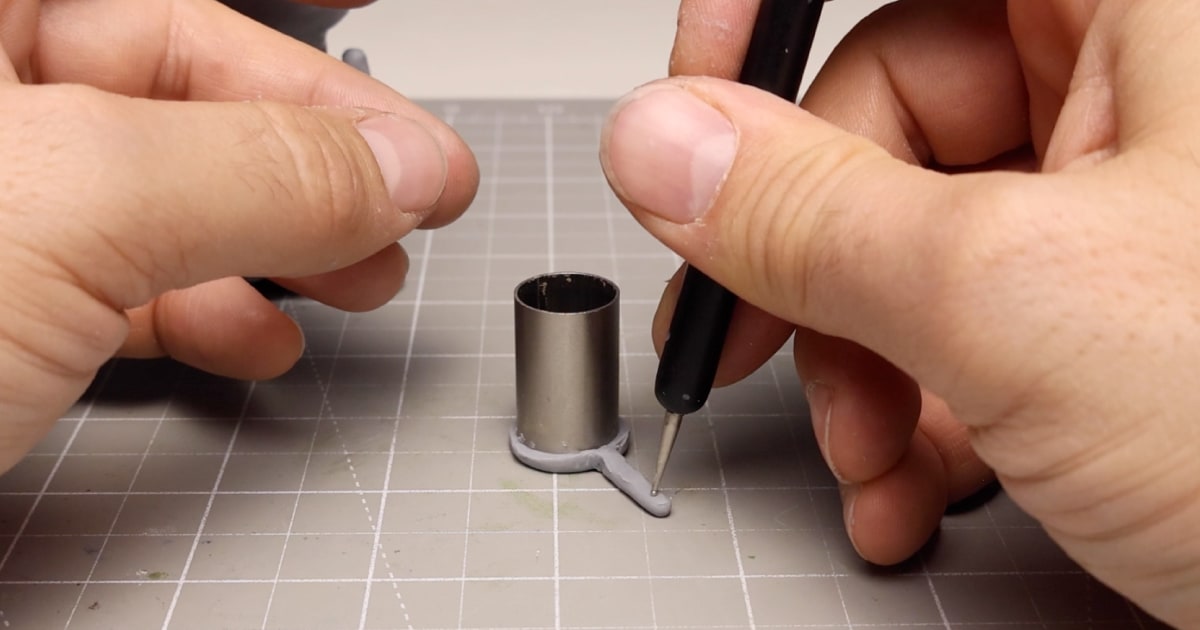
The frying pan was then baked so that I could test fit it into his unbaked hand to make sure it fit without ruining things.
I then moved on to adding some detail to Toads’ waistcoat, pants, and shoes using my finer ball-ended sculpting tool, just pressing lightly to make lines in the clay.
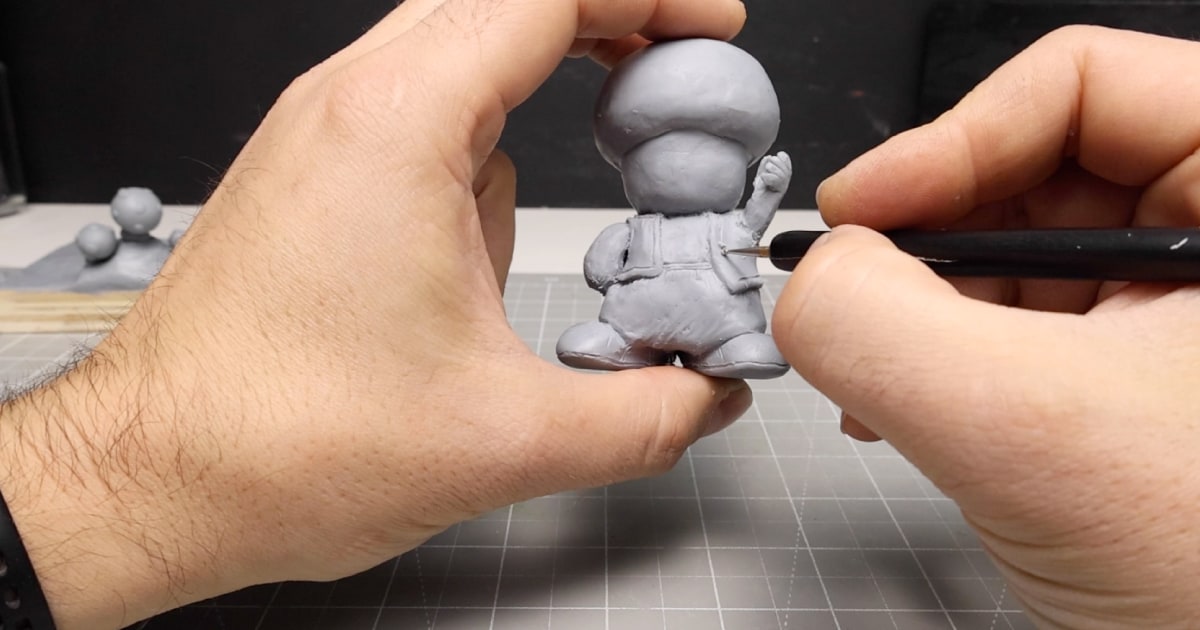
Then, I rolled out a super thin worm to create the string for his trousers. With my big clumpy fingers, this took many attempts to make until I finally used my finer detailing tools to wangle the clay into submission and the form that I wanted before adding it to his pants.
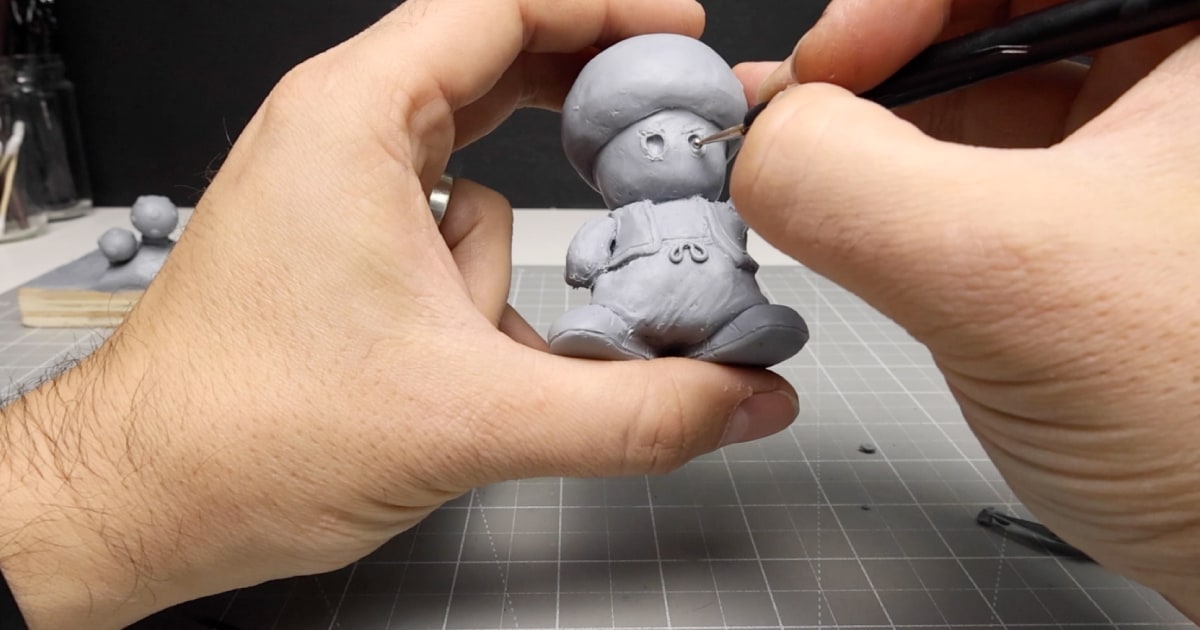
To form the eyes, I used my slightly larger ball-ended tool to dig out two eye holes on his face before rolling up two balls of clay to add to his newly created eye sockets.
To add the final touches to Toads’ evil expression I used small worms of clay for the eyebrows angled down to provide an angry face and hollowed out his evil smile before adding a small tongue poking out ready to eat his smaller toadstool friends.
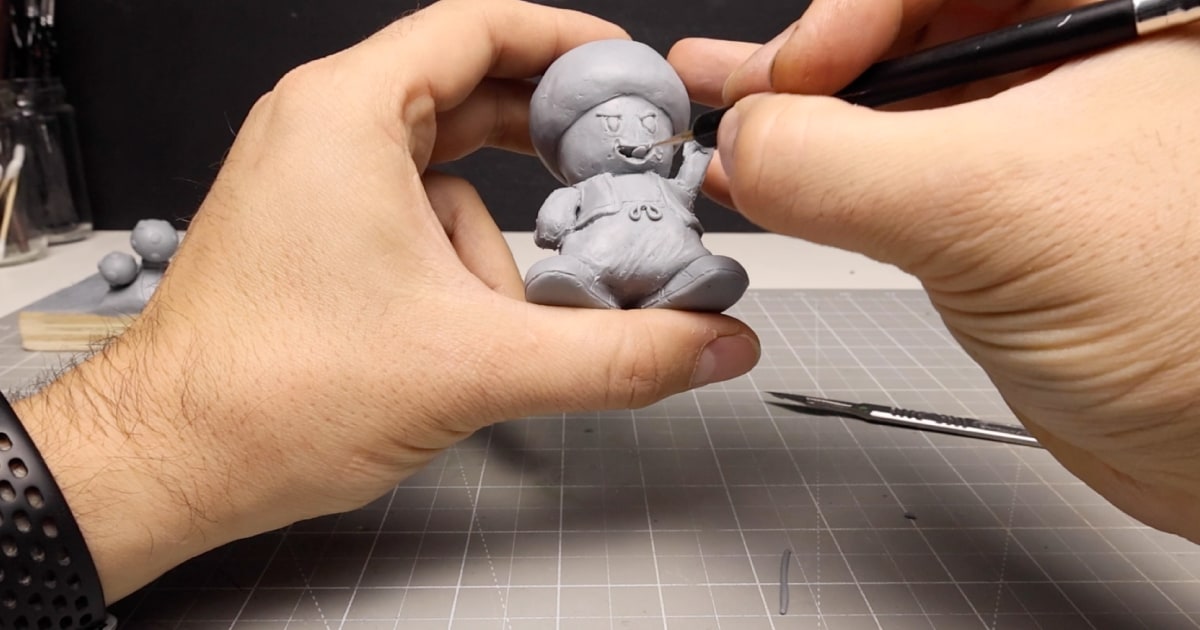
Top Tip: Before baking use some isopropanol alcohol to smooth out the clay to remove any fingerprints and unwanted marks.
Crafting the Diorama Base
With Toad now ready to bake, it was time to move onto the base. I took a piece of my trusted 18mm plywood and cut it to shape.
I then decided to change up my method of creating bases, using more polymer clay instead of Plaster of Paris, which I had used in my Lovecraftian Horror Worm and Rainbow Friends Diorama.
I spread the clay over the base, added a raised area in one corner for Toads’ unsuspecting prey to sit on, and then smoothed it all out to make what will eventually become a forest floor.
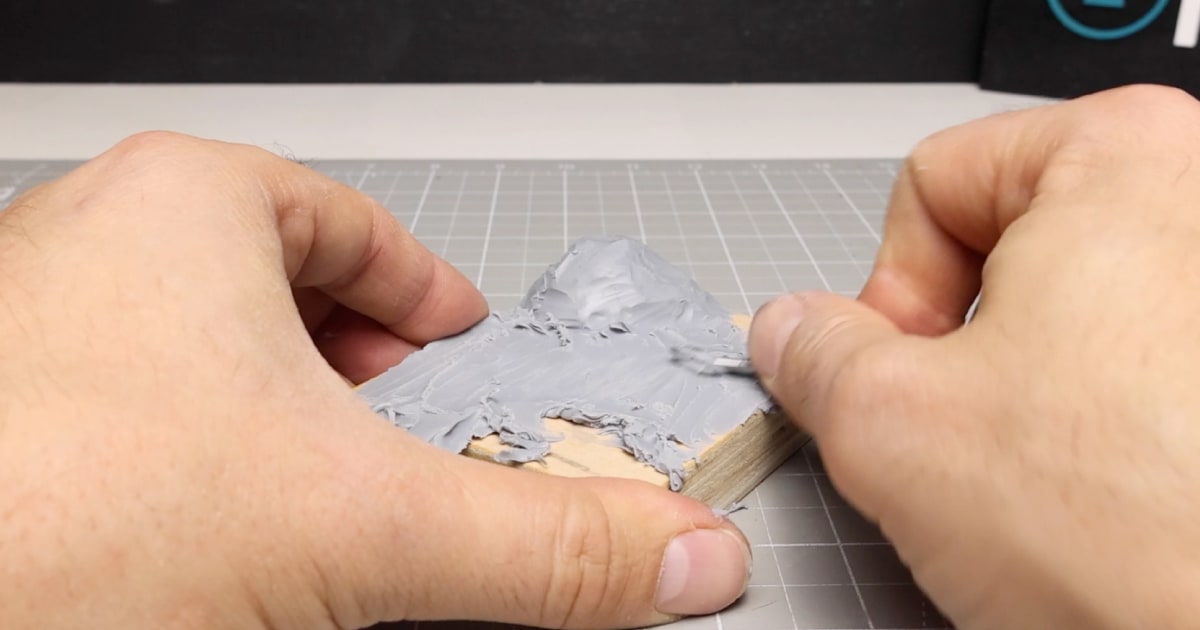
I then moved on to making Toads victims.
Making Toads’ Mushroom Kingdom victims
To set the scene, it was time to create some small toadstools for Toad to use his frying pan on.
To do this I made some small balls of polymer clay and then pushed my tool into the end of it to create the mushroom cap. I then rolled up a worm of clay to make the stem of the toadstool, and pushed it into the cap.
With them combined I then used my metal sculpting tool to join the two pieces together forming the furry bits under the cap.
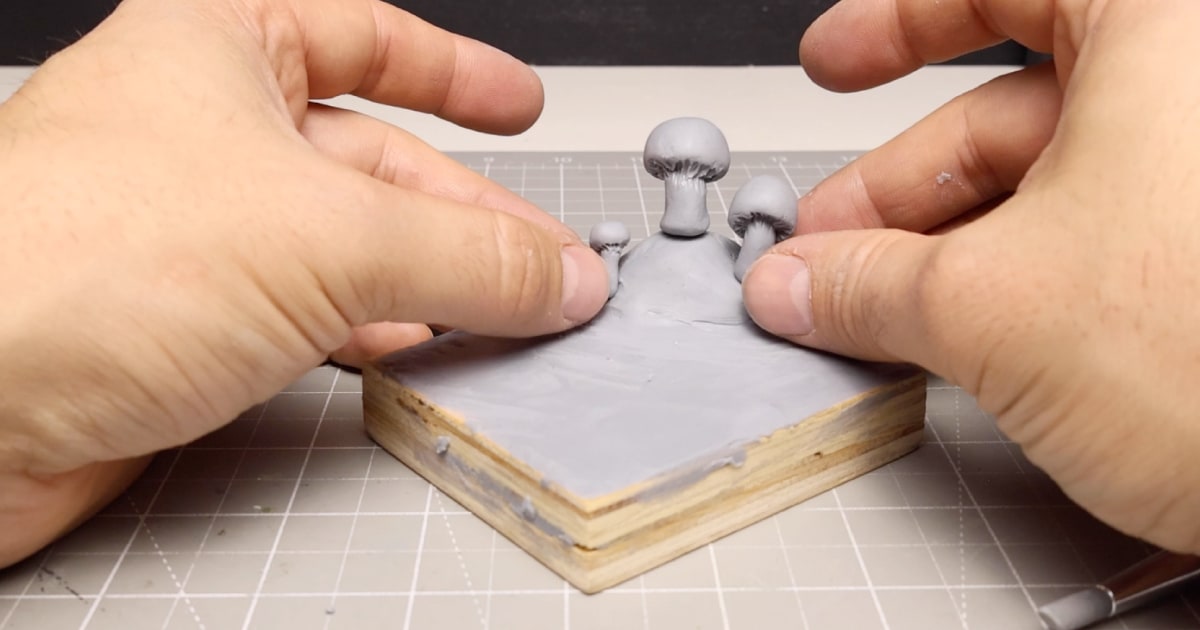
I repeated this two more times, making them slightly smaller each time before adding final touches to them with two eyes, round bits on the caps and wide-opened mouths.
I even made a squished mushroom, which was basically just one of the smaller toadstools flattened to go under Toad’s foot on his rampage through the forest.
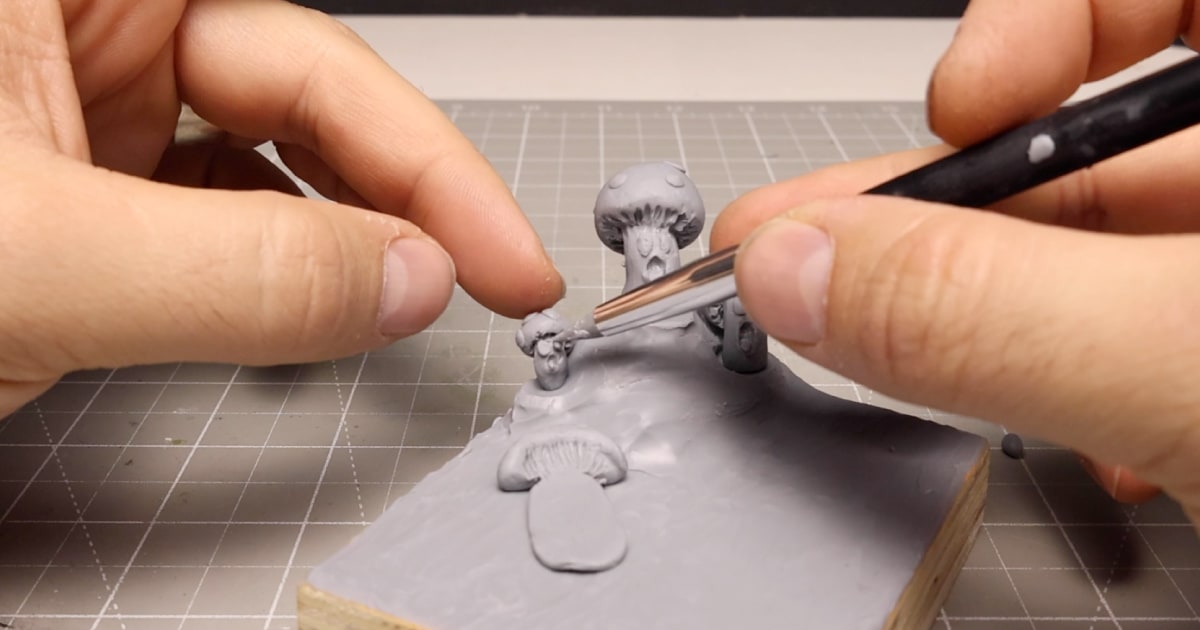
Baking and Hardening the Polymer Clay
With Toad and the Base now ready to bake, I put them in the oven based on the Cosclay packet recommendation of 30 minutes in a 130C (275F) oven for every 1/4 inch thickness of clay.
You need to make sure that the temperature and length of the bake are as accurate as possible. If you bake Cosplay too low, it will be brittle and break easily rather than semi-flexible as it should be.
One problem I thought I might have is using the clay on the wooden base, as the wood expands with the heat. However, this didn’t seem to be a problem this time around.
Just be careful when removing and handling your clay sculpture from the oven as it will remain hot for a while after its baked, and you don’t want to burn you creative fingers.
Painting Toad, Toadstools and the Diorama Base
When it comes to painting polymer clay dioramas, I think it’s all about trial and error. Painting isn’t my forte, and with lots of little bits to paint, it can take quite a while.
You won’t see any painting in the video, as I didn’t want to bore you with it this time around, but given that you’ve read this far through this post, I thought you might appreciate the extra detail.
I started by giving everything a quick airbrush with white acrylic to help seal in the clay before giving the base a coat of brown acrylic. I did a bit of green dry brushing here and there to add some depth before painting on some leafy shapes using thinned-down oranges to complete the grungy evil forest floor.
I painted some leaves left over from a previous project with a few different tones of green acrylic before turning my attention to the mini toadstools.
Painting the Mini Toadstools
Toad’s victims were even quite quick to paint. I used bone-coloured white for the stem, blood-red for the caps, and dark brown underneath the caps. Then, the mouth and eyes were painted black, with a pink tongue to finish off the effect.
Painting His Accessories
Toad was a little more complicated to paint, so before plucking up the courage to finally start painting him, I turned my attention to his frying pan and clever.
I painted the pan part with a mix of gunmetal grey and black to give it a darkened cast iron effect. The handle was painted in a lighter brown to resemble wood. I then dry-brushed on some white highlights to finish it.
As for the clever, I did the same brown for the handle and, instead of adding black, added a little white to the gunmetal grey acrylic for the head of the clever. This was then finished off with a final touch of red blood spatter for added gruesomeness.
Painting Evil Toad
Evil Toad was a challenge for me. I had to get the right flesh tone for his face and hands and adequately paint the inaccessible bits around the waistcoat, arms, and feet.
I stuck with bright white acrylic for his mushroom cap with blood-red spots, blue and yellow for the waistcoat, bright white for his pants, and brown for his shoes.
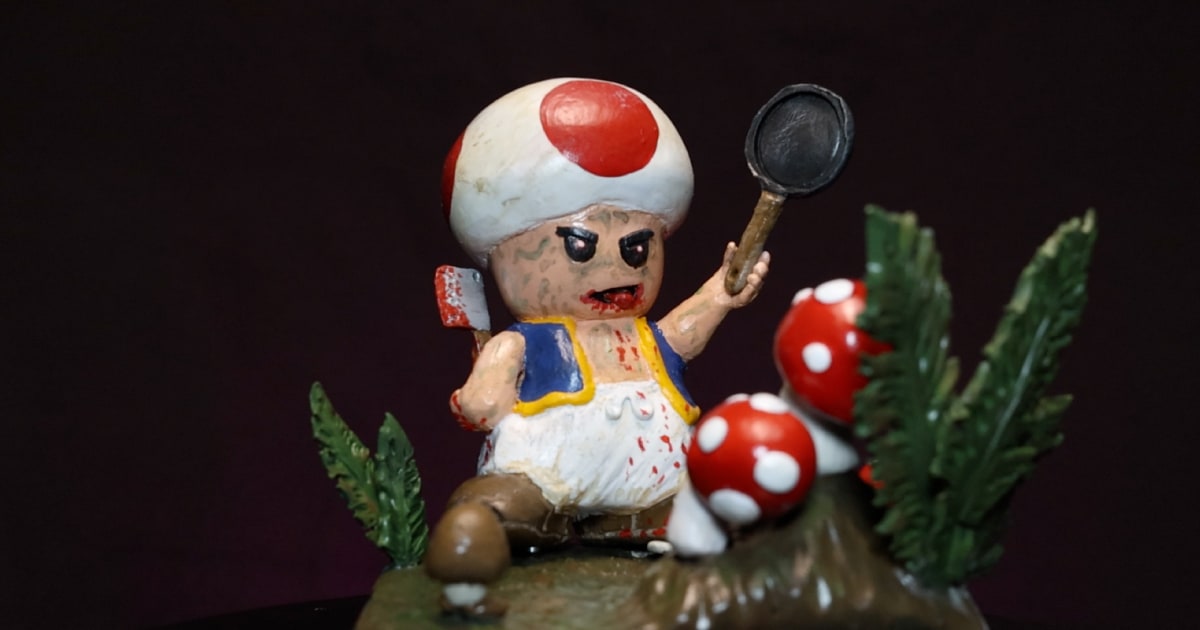
After I had blocked in all the colours, I added a dirty brown wash to his shoes, pants, and cap to make it look like he’d been on a trundle through the dirty forest.
I then added some greenish strokes to his face, arms and chest to make it look like he was a little zombified before adding blood spatters around his mouth, hands and shoes.
Finishing Touches & The Final Evil Toad Diorama Reveal
With everything painted, it was time to assemble. I glued the mini toadstools and leaves into place with super glue, positioned Evil Toad with his frying pan, and concealed Clever over the squished toadstool.
I then gave it all a quick airbrush with acrylic gloss varnish before setting it up for the final reveal.
I think that the overall scene worked out quite well; the mini toadstools look satisfyingly horrified by the Evil Toad brandishing his frying pan and blood everywhere.
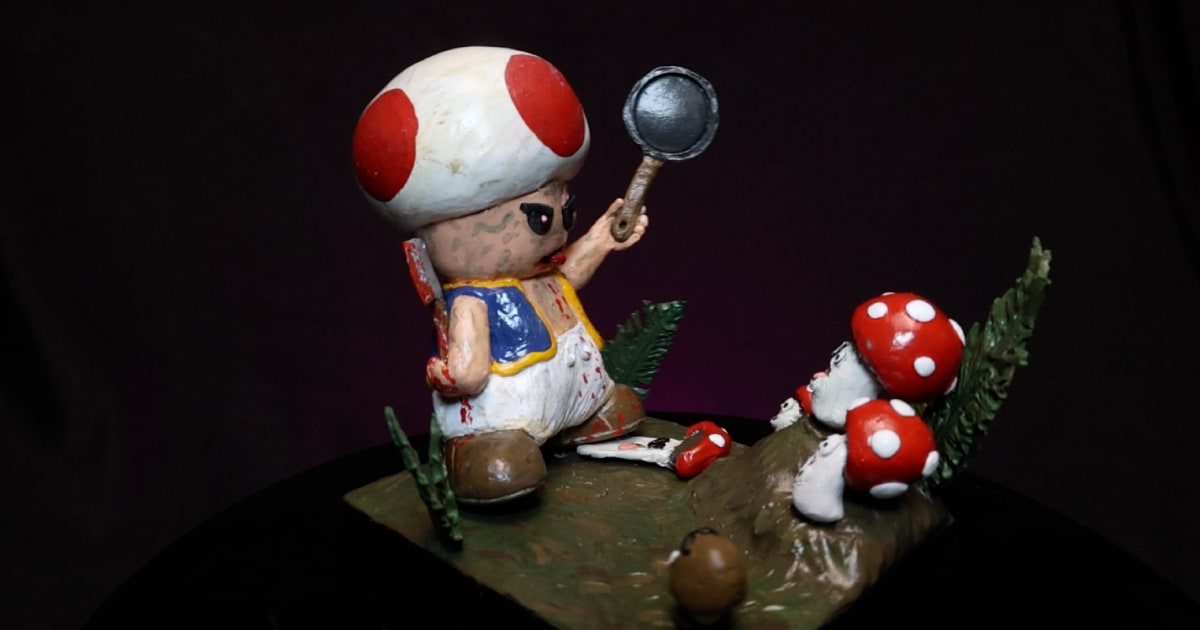
Was it my best diorama, probably not, but it was fun to create, and I bet you won’t find any other polymer clay sculpture like it anywhere in the world.
If you enjoyed this tutorial, don’t forget to like and subscribe to support my channel and stay updated on future creations! I’d love to see your take on Evil Toad, so be sure to leave me a comment on my videos, and I’ll take a look.
Take a look around NoLimitNerd.com for more of my creations, or head over to my YouTube channel, where you’ll find the latest creations first.
Tools I Used
Heads up. Some of these links are affiliate links if you click on them and buy something I might make money which will help you support NoLimitNerd at no extra cost to you.
Sculpting Tools
- CosClay
- Green Stuff
- A2 Cutting Board
- Pasta Maker
- Sculpting Tools
- Modelling Tools
- UV Resin
- UV Light
- Vinyl Gloves
- Armature Wire 1mm
- Armature Wire 3mm
- Super Glue
Painting Equipment
- Paint Brushes
- Acrylic Paints
- Valejo Airbrush Thinner
- Air Brush Kit
- Air Brush Cleaner
- Gas Mask
- Acrylic Gloss Varnish
Filming, Audio & Tech
- Cannon EOS R8 Camera
- Cannon RF 50mm Camera Lens
- Lexar 128GB SD Card
- Softbox Lighting with Diffuser
- Camera Tripod Ball Head
- NEEWER Led Lights
- Fifine Microphone (USB)
- Rotating Display Turntable
- Black Backdrop Cloth
- Microphone Arm – for Overhead Camera
