How To Make Santa Claus Figure For Christmas | Polymer Clay Sculpting
Bring the magic of Christmas to life with this fun and creative project! In this tutorial, I’ll guide you through how to sculpt your very own Santa Claus figurine using polymer clay.
Whether you’re decorating your home for the holidays or looking for a unique handmade gift, this step-by-step guide is perfect for crafters of all skill levels. By the end, you’ll have a festive Santa Claus figure that’s sure to spread holiday cheer. Let’s get started!
Essential Materials for Crafting a Santa Claus Figurine
With the festive season in full swing, it was time to put my skills to the test, making my very own custom Santa figurine with a few added accessories.
To recreate this figure yourself, you’ll need to grab a few essentials. You’ll need some tin foil, Polymer Clay of your choice (I used Cosclay), sculpting tools, a knife, paints, Isopropanol Alcohol (optional), and access to an oven to bake it.
With your materials gathered, it’s time to clean your workspace of any dirt or dust that could stick to the clay. If you don’t want to leave any fingerprints on your clay, put on a pair of nitrile gloves, like the doctors wear.
With everything ready, it’s time to start building your Santa figure.
Looking for something dfferent? Why not check out my video on How To Create a Custom Bobblehead.
Sculpting Santa Claus
To start, you’ll want to create two balls of tin foil: one to use as the base of the body and one to use as the base for Santa’s head.
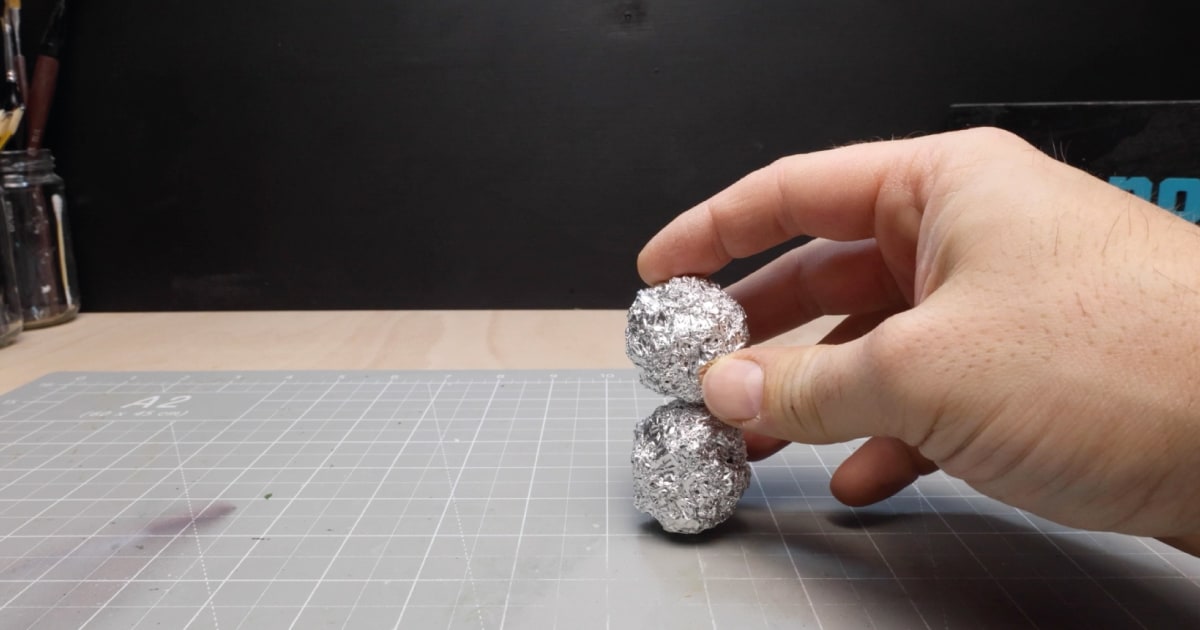
You’ll then want to take one of these balls and cover it in clay. To do that, roll out a flat layer of clay using a rolling pin or Pasta Maker if you have one and wrap it around your tin foil ball. This creates the starting point for Santa’s body.
With a basic rotund body shape, it’s time to move on to the arms. You’ll want to roll out two thick worms of clay the exact same size.
Then, you must squidge each arm into position at the top of the clay ball on either side.
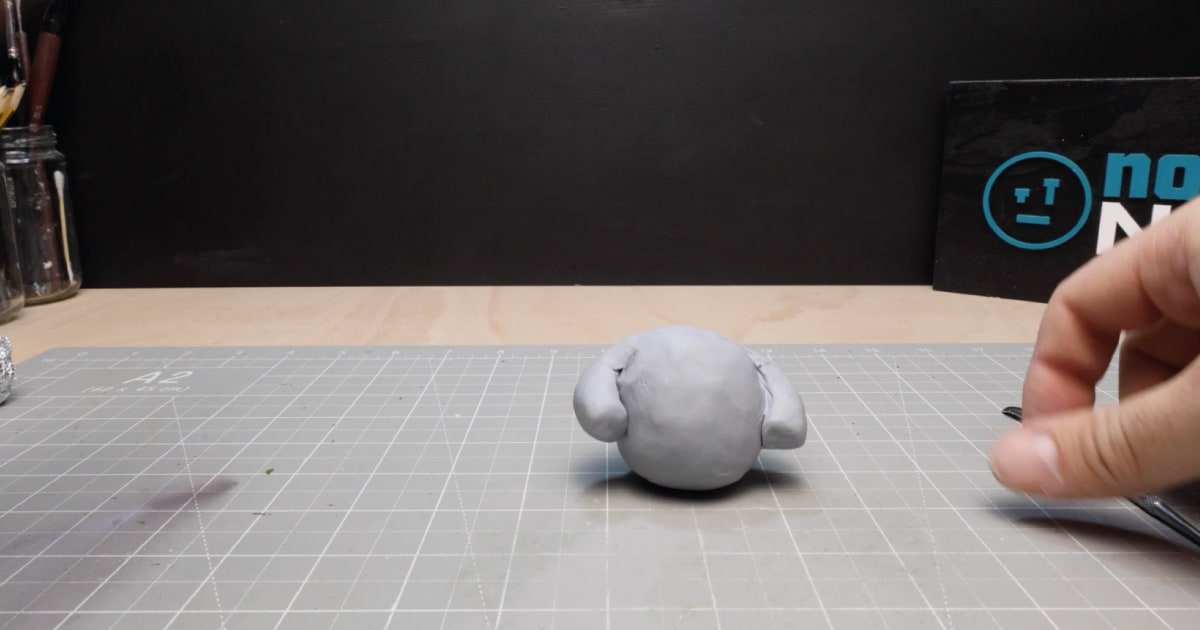
For the legs, you’ll want to make two similar-thickness worms of clay but a little shorter in length. Then, add these to the position at the bottom of the body, ensuring that you blend the legs onto the body to secure them.
With the arms and legs now attached you’ll want to turn your attention to making the head.
Adding A Head to Santa
Take the second ball of tin foil you made earlier and wrap it in clay, just like you did for making your Santa figure body. Then, shape it into a round ball head shape.
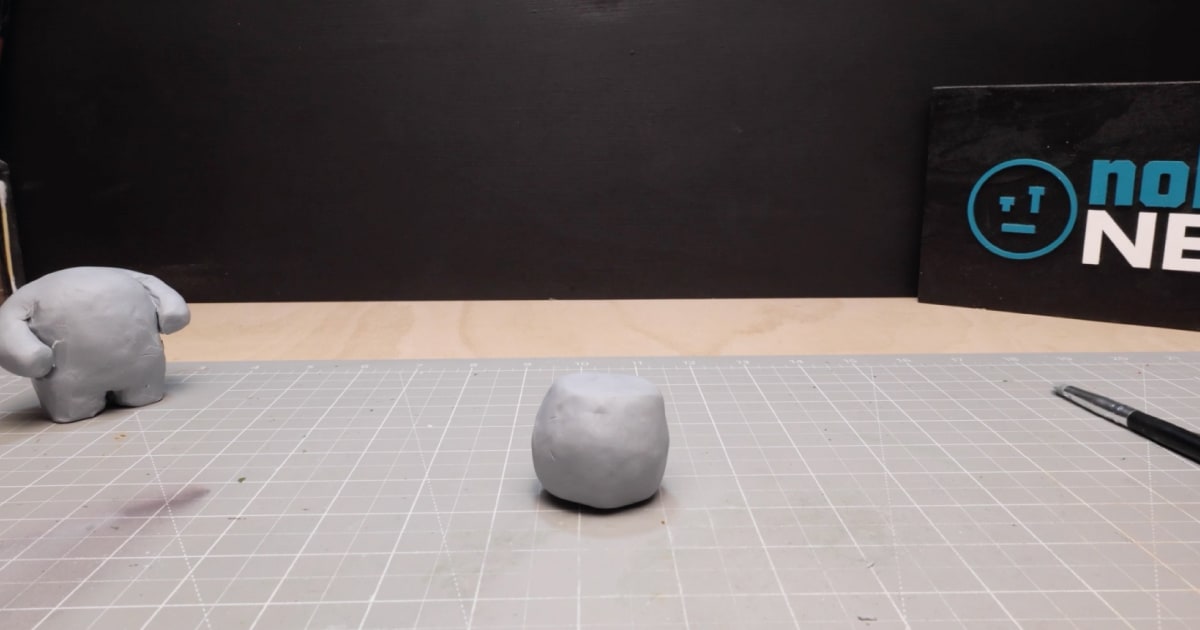
After making the rough head shape, you’ll need to cut out a section at the top of the body to fit the ball head you made earlier. To secure the head into position, take a length of 3mm armature wire and insert it into the body and its tin foil core. Then, add the head to the other end.
To join the two pieces of clay, you can create a thin worm of clay, wrap it around where the two body parts meet, and blend it using your sculpting tool.
Then it’s time to take your sharp scalpel knife and cut out a section from the head to create a flat front for Santa’s face. With that done, you can focus on adding a few extra details.
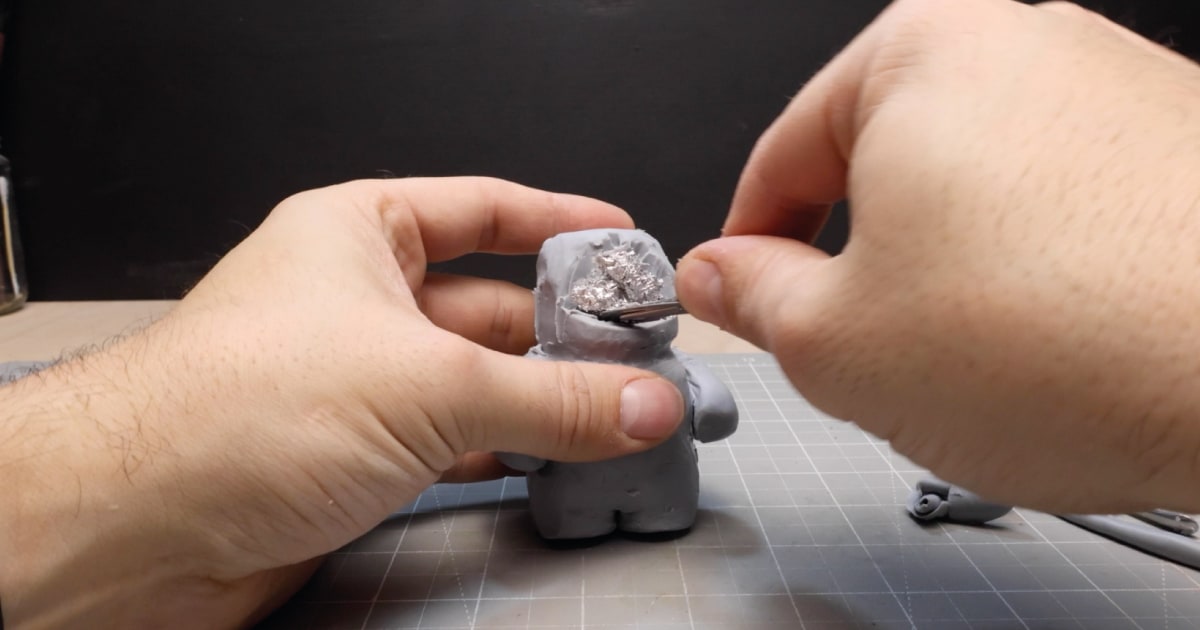
With the rough body and head shape complete, it’s time to take a flat layer of clay and cut out a shape for his beard. To ensure it’s the right fit, put it up against the head and mark where you’ll cut it to ensure the face isn’t covered.
Then, blend it into the rest of the head to attach it properly. To make Santa’s moustache, roll up two clay worms with two pointy ends, one smaller and one larger than the other. Then, add each into position just above where the beard starts.
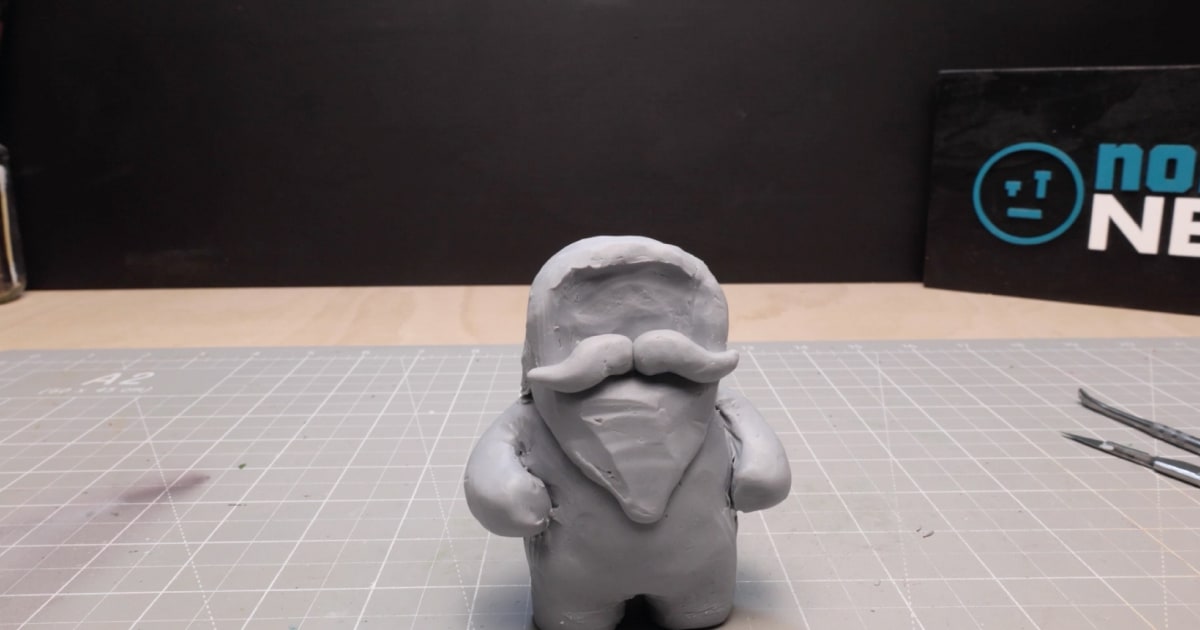
Building a Sturdy Base for Your Santa Claus Figurine
To help sculpt your Santa figure, you’ll want to make a temporary base for him to stand on.
You can use any wood you have. For instance, I took some scrap 18mm plywood I had lying around and cut it down to a size slightly larger than my model would be.
Then, you’ll want to position your Santa in the middle of it and mark the centre of the legs with a pencil at the front and each side. Then, take your Santa figure off and draw a small straight line towards the centre of the wood for each. This should land you with an X, giving you the position in your wood to drill.
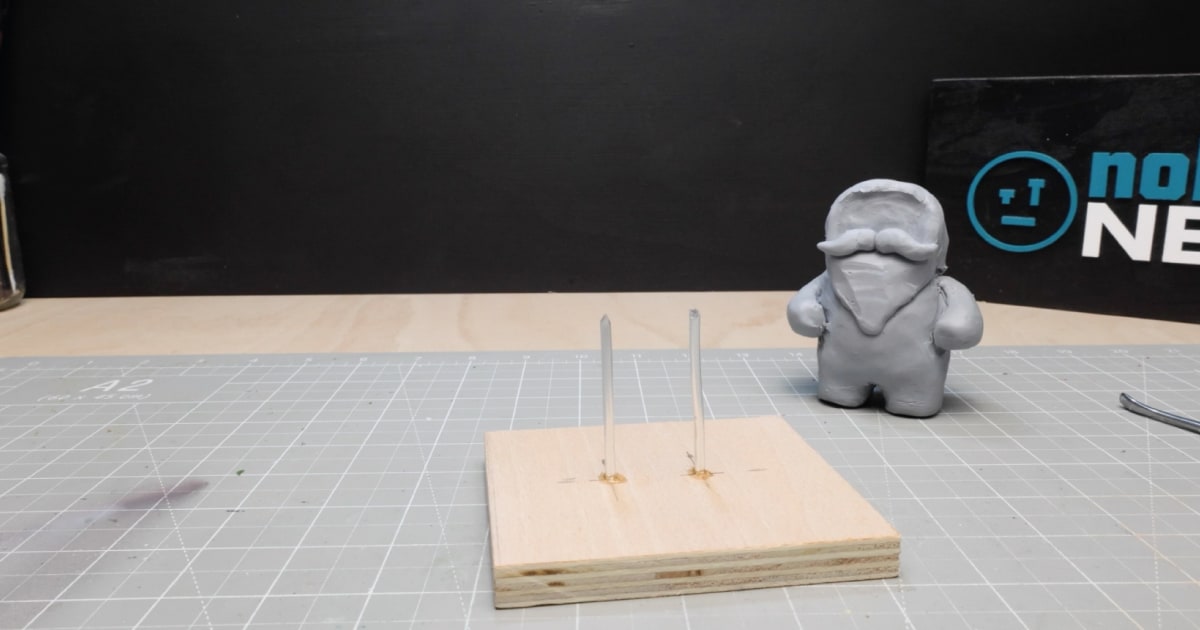
Drill a 3mm hole into each position, ensuring you don’t drill all the way through. Then add a little super glue into the hole (you could use epoxy putty, but it takes longer to dry) and a length of 3mm armature wire into each hole. Once secure, cut the wire to size so that enough sticks into your figure but doesn’t come out.
Then gently squidge your Santa figure into position, leaving a small gap at the bottom to add his shoes.
Adding Details: Boots, Fingers & Outfit
With Santa in position, roll up a few thick worms of clay and give them a squidgeroo to flatten them out into the shape of shoes. Then, add the shoes to each foot on Santa, making sure you blend them to his legs to keep them from falling off when you lift Santa off his base later on.
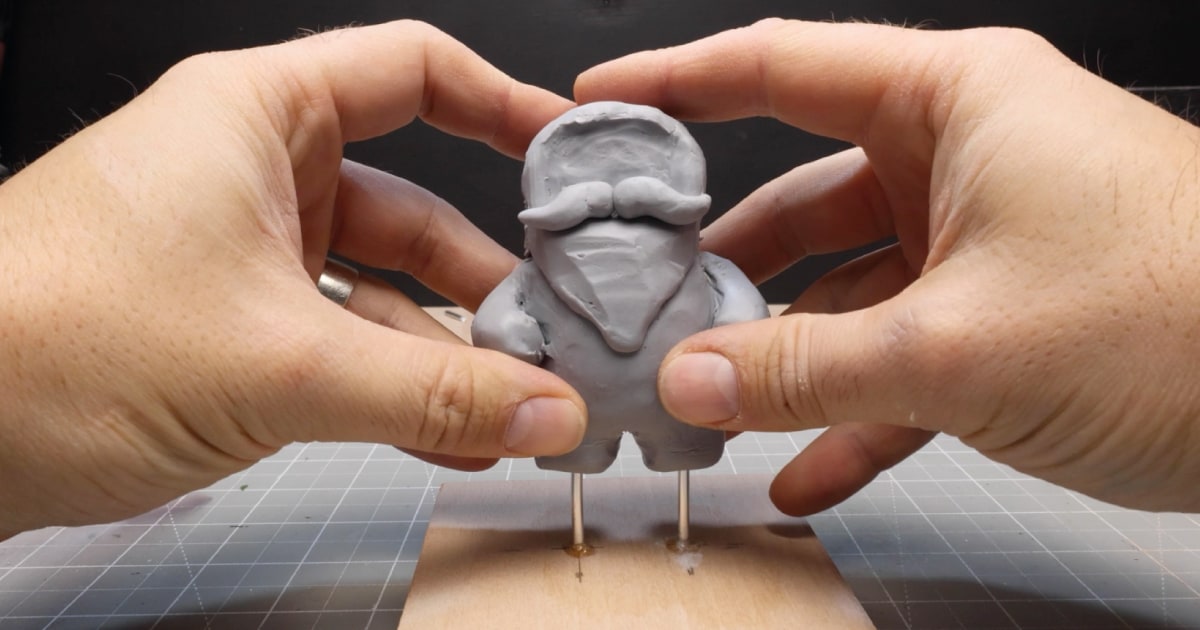
You can then add a few finer details to each boot, rounding off the fronts, adding lines where the soul meets the body of the boot, a tongue, and some laces.
With the boots finished, move your attention to adding his fingers.
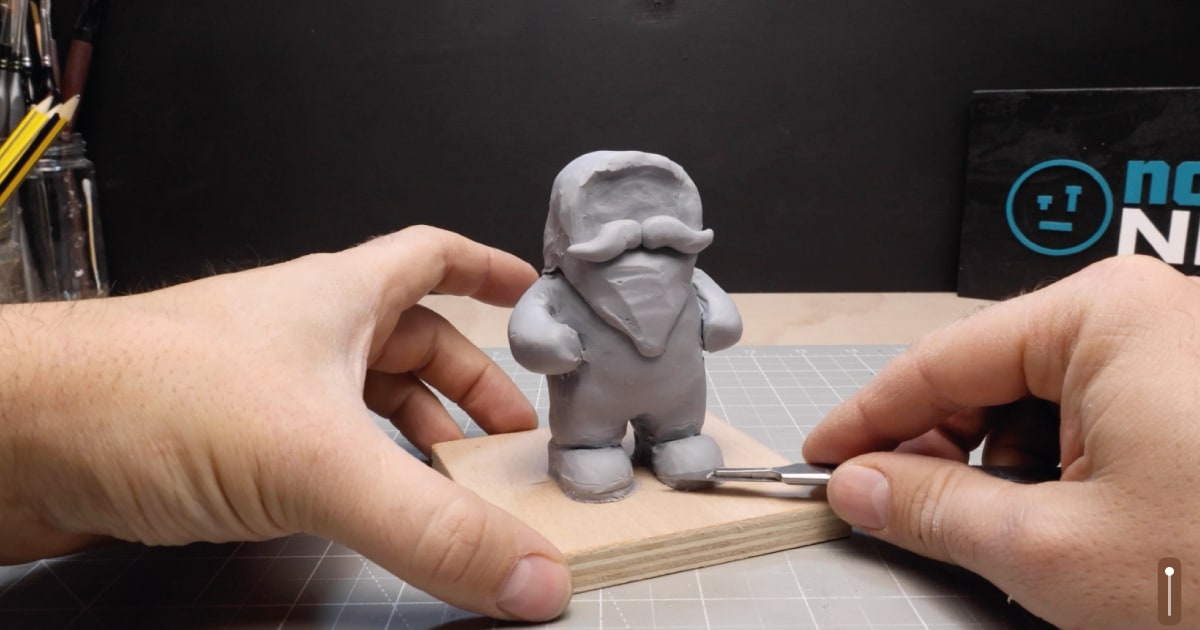
Roll out some thin worms of Cosclay and cut them to an appropriate size. Then add five worms to the end of each arm, blending as you go. If you want Santa to hold something, ensure you use a placeholder that you can remove easily. In my case, I used a circular cutting tool positioned in the hand to wrap his fingers around.
After that, it’s time to move on to adding some details to his outfit. You’ll want to roll a thin but long worm of clay. Then, wrap your worm around your Santa figurine’s whole body to form the bottom of his jacket. At the front, add two worms from the bottom of the jacket to just under his beard to form where his jacket would naturally open.
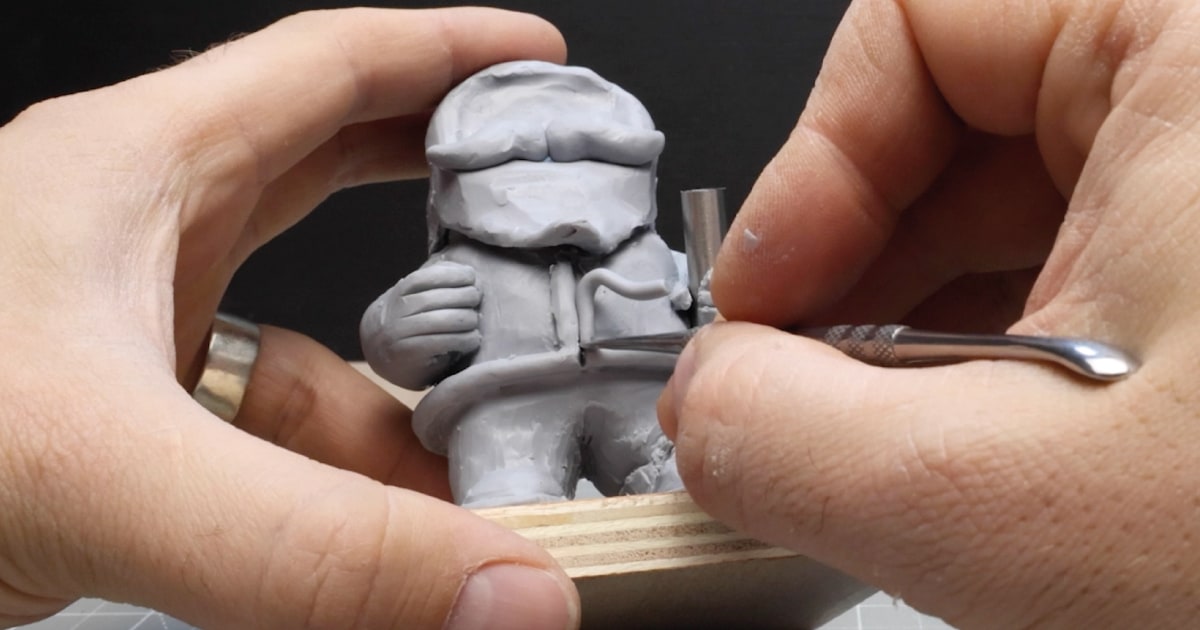
Once that is complete, wrap your worm around the end of one arm just before the hand to make a cuff and cut it to size. Repeat on the opposite arm.
You’ll also want to do the same around the bottom of each leg just above the boot before blending them all into place.
Adding Fine Details: Belt, Santa Hat, Beard Hair & Facial Features
Roll out a super thin, flat piece of clay to make Santa’s belt, which fits just beneath the jacket you just added.
Then, cut long, straight pieces about 4mm or 5mm thick using your scalpel and a ruler. Then, carefully wrap your piece of clay around underneath the jacket line and gently push it into position. You can then add a line detail to the belt using your sculpting tool, create the belt buckle as seen in the image, and add a couple of holes for where the belt buckle attaches to complete that part.
Moving on to Santa’s hat, you’ll need to roll out another worm of clay, wrap it around Santa’s head where the hat is, cut it to size where the two ends meet, and gently blend it into the main head.
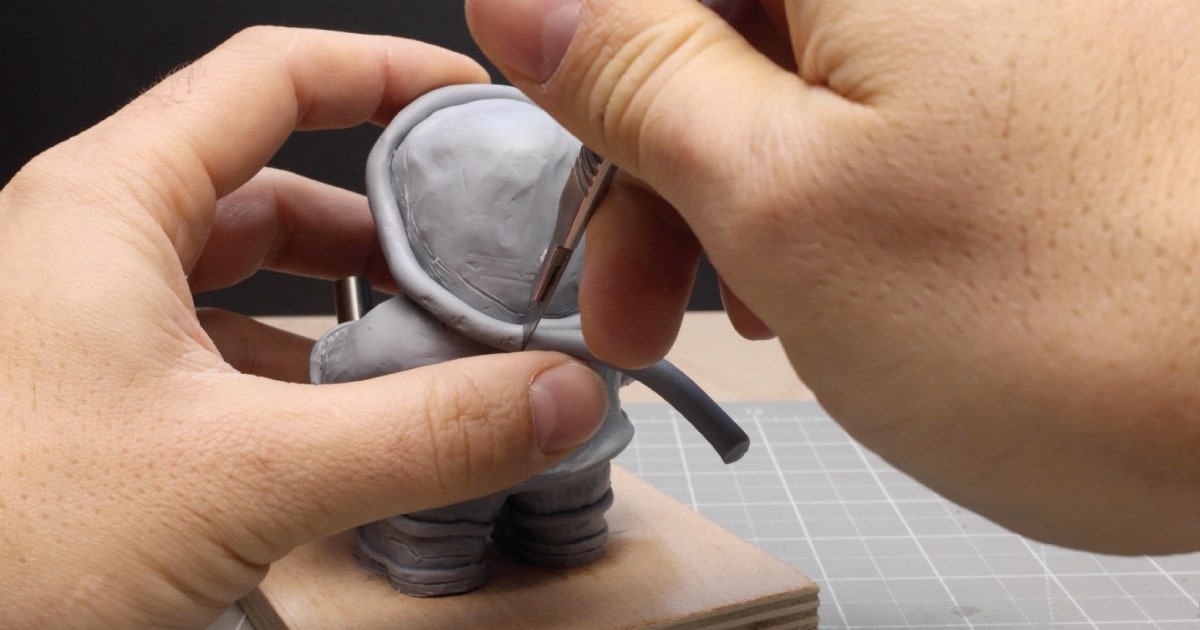
Then, take a thick blob of clay and shape it into the peak of the hat. Add it to one side of the figure and blend it into the clay to shape the overall hat. When you’re happy, roll up a small ball of clay and add it to the tip of the hat to form the bobble.
Now, just a few details are left before it’s time to bake your Santa figure.
To make Santa’s beard and moustache stand out a little more, you’ll want to add some texture to them. To do this, take your sculpting tool and gently make lines into the beard, along the top just underneath his hat, and on his moustache to resemble a kind of wavy hair look.
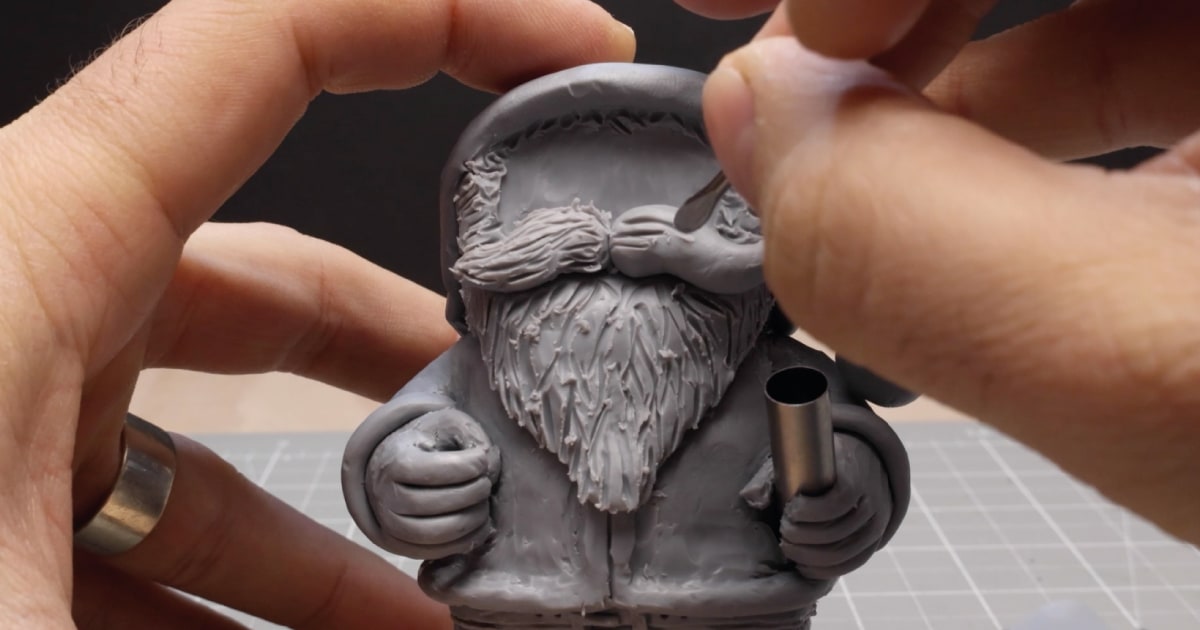
After you’ve done that, you can give the whole figure a gentle wash down with isopropanol alcohol, which will smooth out any unwanted fingerprints and marks.
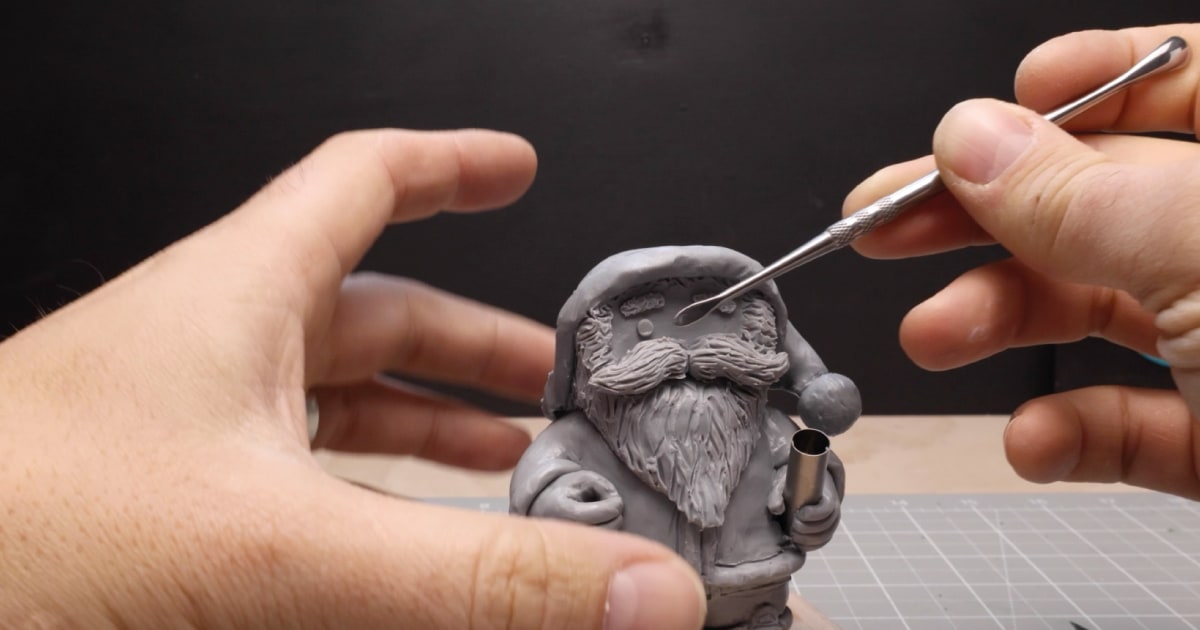
With the face now smooth, you can make some small lengths of clay for the eyebrows and attach them into position. Once in position, give them the same hard treatment as the beard with a small pointy tool.
Then, for the eyes, create two small balls of clay and squish them flat into position on his face between his eyebrows and moustache. Your figure is now ready to bake.
Making Accessories
Before you bake your Santa, you might want to add some accessories to your figure. For example, he could be holding a present, a sack full of toys, or anything else you can think of.
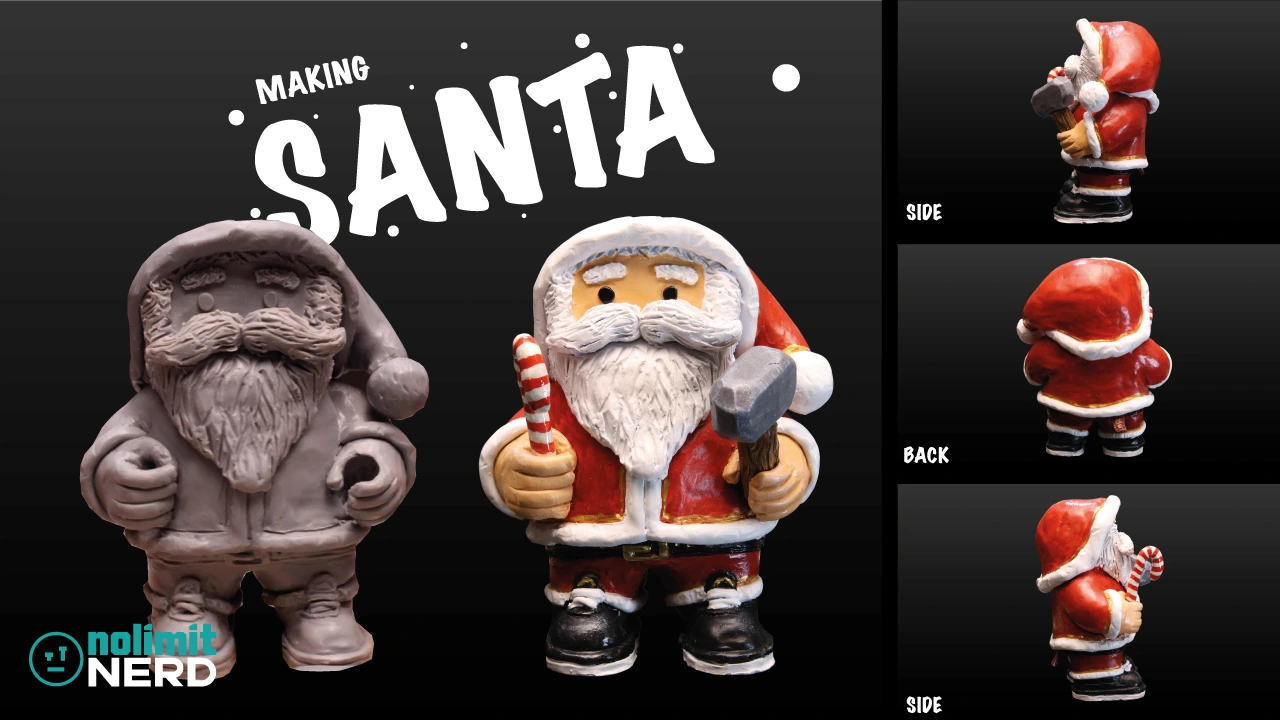
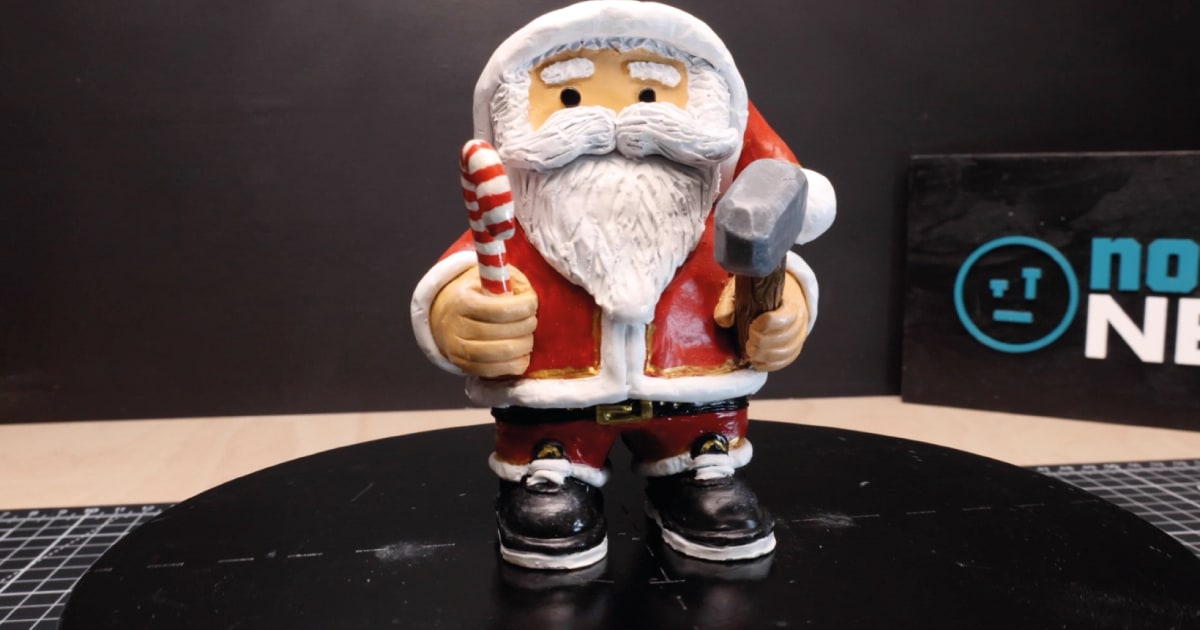
In my case, I created a simple candy cane by bending a worm of clay into a cane shape and making sure it would fit into his hand. For the other hand, I decided a metal mallet would be appropriate to showcase his workshop toy-making skills.
To make the mallet, I shaped a block of clay and added it to a worm. I test-fitted it into place and made some marks in the clay worm to represent a wood effect—something you could do later with paint if you wanted.
Baking Your Polymer Clay Santa Claus Figurine Safely
Once you’re happy with how your figuree looks and you’ve created your added accessories it’s time to bake.
For this, you’ll want to follow the instructions for the type of polymer clay you have used, as they all have different cure times. For instance, Sculpey tends to bake quicker than Cosclay but is less flexible once cured.
As I was using Cosclay, I measured the thickest part of the model, set my oven to 130C, and baked it in accordance with the instructions, which stated to bake for 30 minutes in a 130C (275F) oven for every 1/4 inch (6mm) thickness of clay.
Once it’s baked, be careful when removing it from the oven, as the clay will stay hot for quite a while afterwards. Your figure is now ready for paint.
Painting and Finishing Your Santa Claus Figurine
You can paint your Santa figure whatever colours you like. In my case, I stuck with the classic Christmas colours of Red, White, Black and Gold.
To start, you’ll want to give your figure a base coat. You can use any type of primer, but as I had none to hand, I base-coated my Santa figure in a thinned-down white acrylic using my airbrush for a nice, even coat.
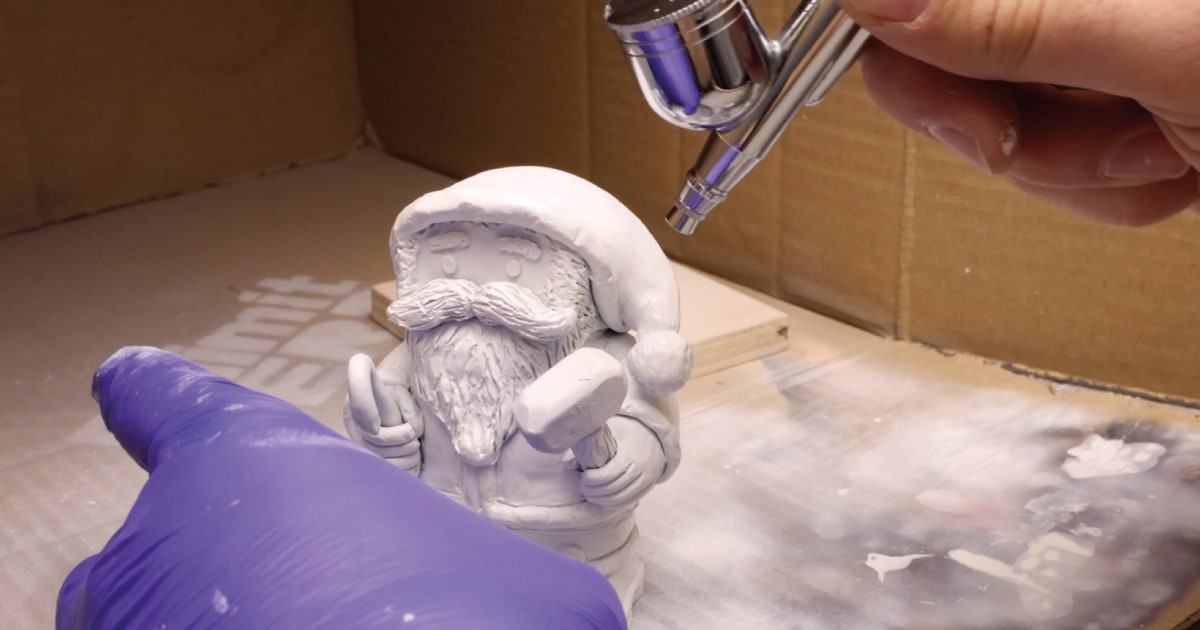
After that, you’ll want to paint Santa’s hat, jacket, and trousers bright red. I used Blood Red, as that’s all I had. It might take a few coats to get a good, even coverage.
[nlnl_img src=”/wp-content/uploads/2025/01/custom-santa-figure-painting-blood-red-14.jpg” alt=”Painting Santa’s Outfit Blood Red Using a Paintbrush”]
When that’s dry, move on to painting his boots, belt, and eyes with black acrylic. Then, create a light skin tone by mixing yellow, red, and white together. Then, add the skin tone to the face and hands, trying carefully not to paint over any of the colours you’ve already painted.
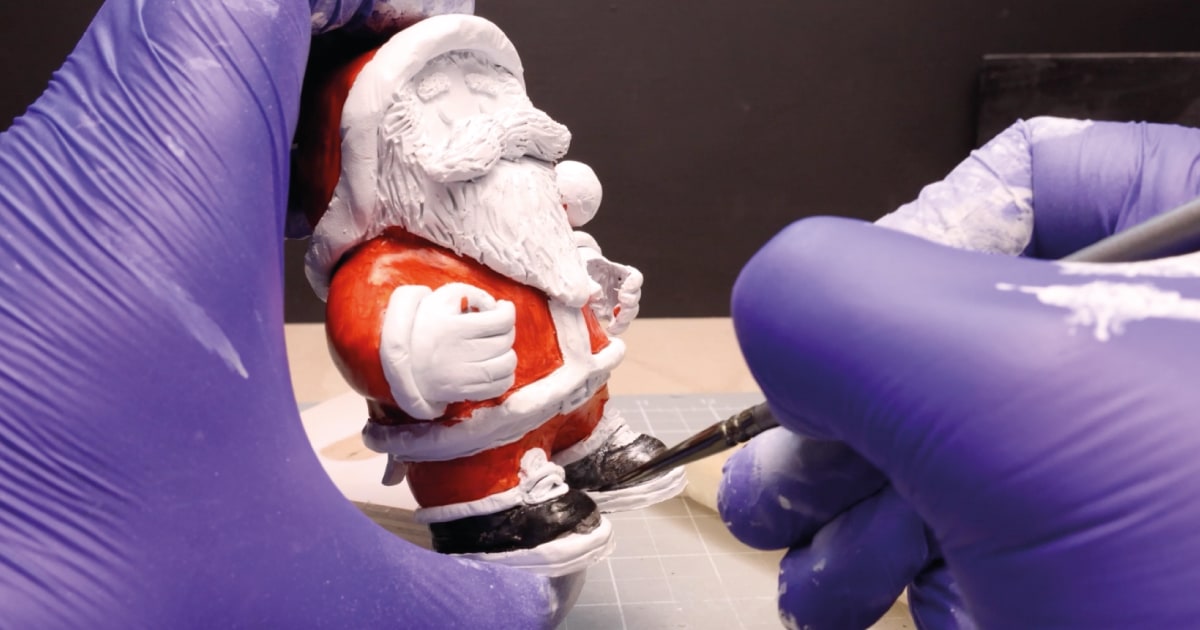
Add a little gold flourish to his belt buckle, boots and around his jacket, and you’re nearly done.
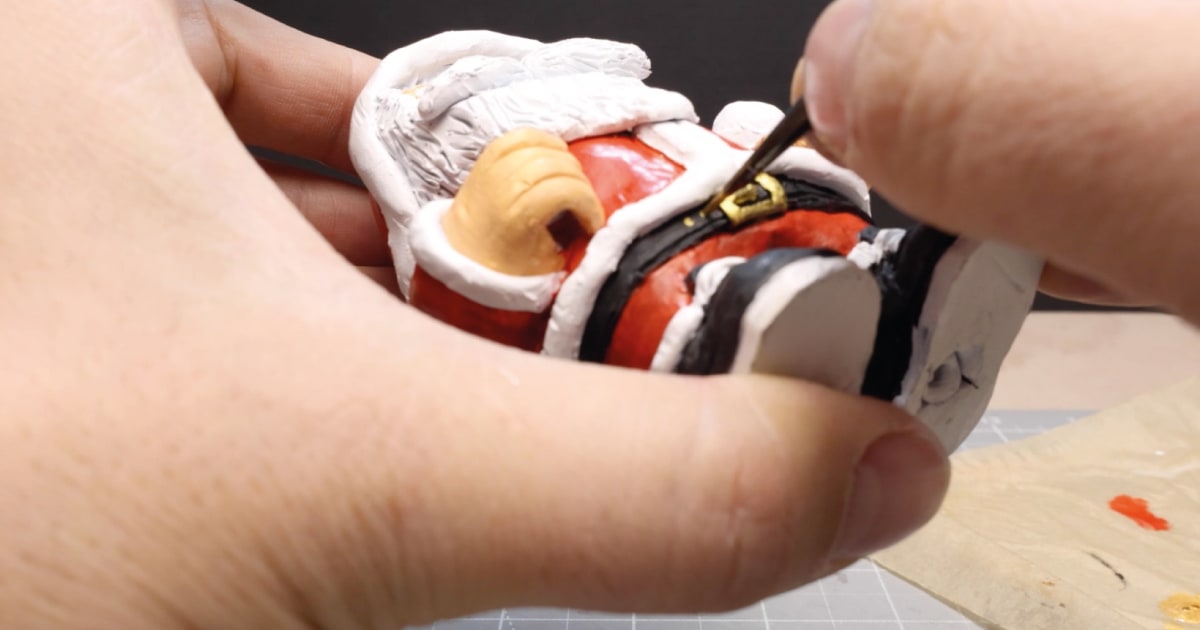
If you want to add some highlights, you can then use your dry brush lightly loaded with white paint to brush over areas of his boots, jacket, and hands to add some detail.
You can use the same technique to give his beard some low lights of grey, which will help define the hair lines you made when sculpting your Santa figure.
After everything is painted, you can give the whole figure a wash of acrylic varnish to help protect it.
Time For The Reveal
With your santa figure now painted, you can remove it from its stand and use it as you will.
Perhaps you want it as a permanent decoration in your Christmas collection, wrap it up and give it to a friend, or just add it to your own collection of polymer clay creations. Either way, it’ll be a talking point for all.
I added his candy cane and mallet and used them as Christmas decorations.
Share Your Creation and Explore More Tutorials
I’d love to see your version of this festive Santa Claus figurine!
Share your finished creation by commenting on the video on my YouTube channel using #PolymerClaySanta. Whether you’re a beginner or a seasoned crafter, your work inspires others to dive into the world of polymer clay sculpting.
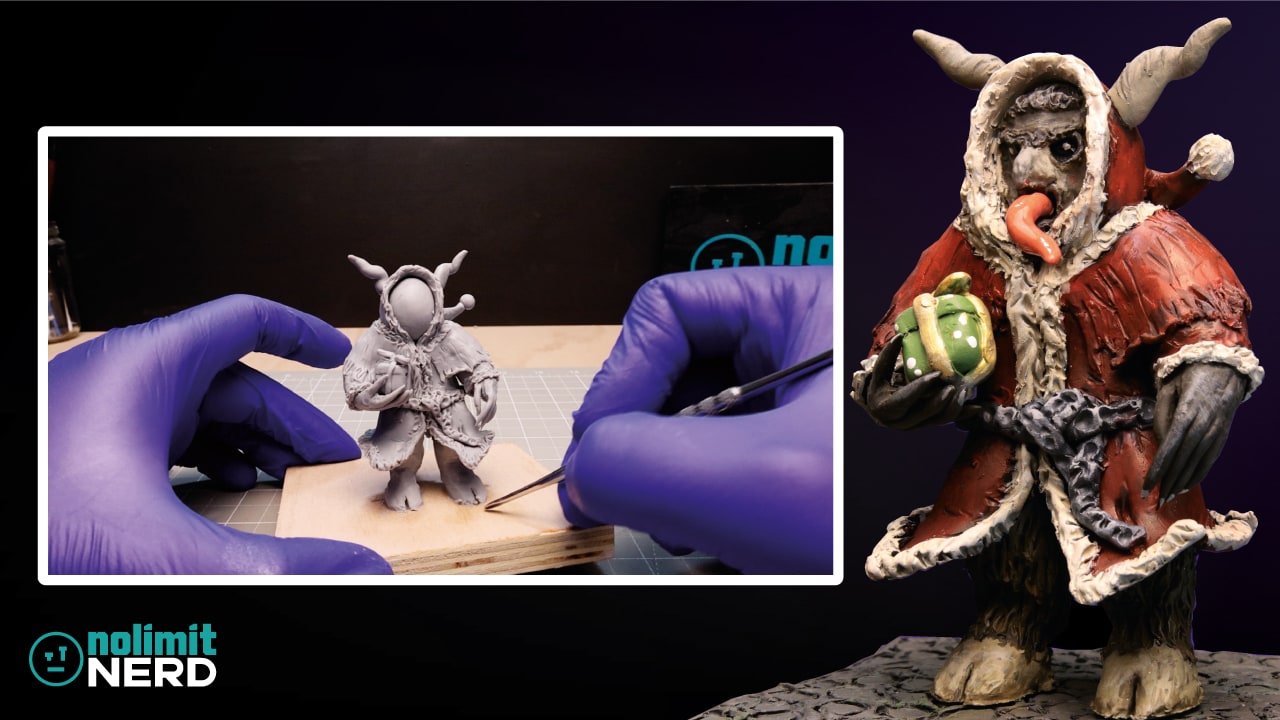
Looking for more creative holiday ideas? Check out our other tutorials, like how to make a Christmas Krampus with polymer clay. Don’t forget to subscribe for guides and crafting inspiration!
Tools I Used
Heads up. Some of these links are affiliate links if you click on them and buy something I might make money which will help you support NoLimitNerd at no extra cost to you.
Sculpting Tools
- CosClay
- A2 Cutting Board
- Pasta Maker
- Sculpting Tools
- Modelling Tools
- UV Resin
- UV Light
- Vinyl Gloves
- Armature Wire 1mm
- Armature Wire 3mm
- Super Glue
Painting Equipment
- Paint Brushes
- Acrylic Paints
- Valejo Airbrush Thinner
- Air Brush Kit
- Air Brush Cleaner
- Gas Mask
- Acrylic Gloss Varnish
Filming, Audio & Tech
- Cannon EOS R8 Camera
- Cannon RF 50mm Camera Lens
- Lexar 128GB SD Card
- Softbox Lighting with Diffuser
- Camera Tripod Ball Head
- NEEWER Led Lights
- Fifine Microphone (USB)
- Rotating Display Turntable
- Black Backdrop Cloth
- Microphone Arm – for Overhead Camera
