Making A Lovecraftian Horror Rock Worm Diorama Using Polymer Clay
I was looking to do something a little different from the norm, so I dug into popular horror culture and found a description of a rock worm, and thought, hey perhaps I can make that. So I did. Watch the video to seem me create this horror rock worm in detail, including making the base and painting.
If you like what you see then don’t forget to hit the Subscribe button to help me grow my channel, leave a comment like it with a thumbs up.
How To Create a Lovecraftian Rock Worm Creature Thingy
Not In a watching mood? Then, I’ll go through this project in more detail, explaining each step below.
I was searching for an interesting creature to create, and with the Dune 2 movie just released with the iconic sandworm, I originally was going to see if I could make that.
However, not wanting to do something that’s been done and much better by others, I decided to create my own kind of worm creature based on a Lovecraftian description, that I have misplaced by the time I wrote this.
With this description in mind and not having done anything like this before, I set out to figure out where to start.
Research Is The First Step To Success
I started by doing my research, which, of course, meant watching endless hours of other creators’ YouTube videos on on clay sculpting techniques to get the hang of the process.
Once I had done my research, the first step was to make my armature out of armature wire, then wrap it in tin foil as a base for clay to stick to and give it its initial shape.
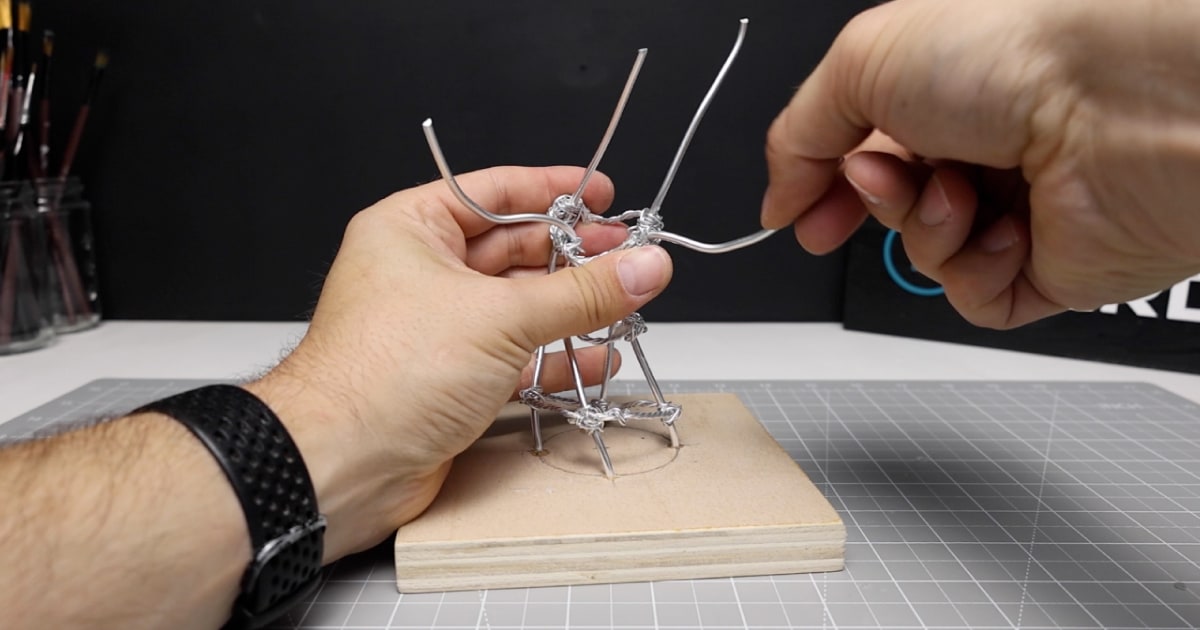
Once complete, the armature acts as a good way to save money, too, as you don’t use up as much clay, which, when you’re on a budget, comes in pretty damn handy.
Once I had warmed up and squidged the Firm Sculpey clay, I used my pasta maker to roll it out into sheets that could be easily added to the armature.
I then gave it all a good Squidgeroo to ensure it was all tightly packed together to form the basic body shape.
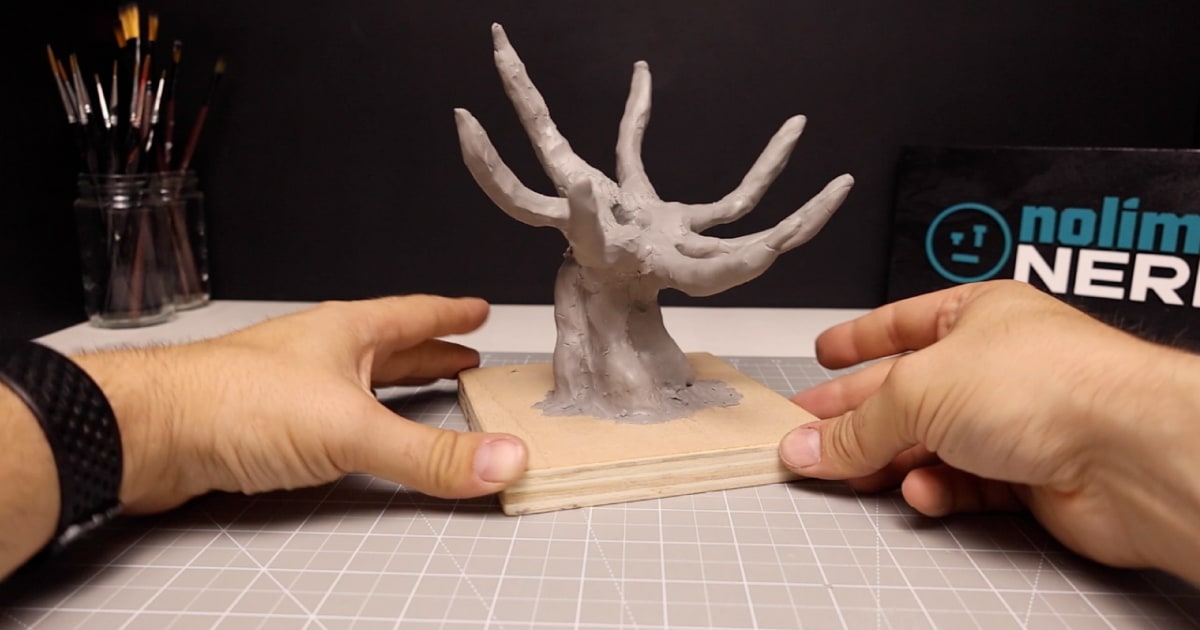
Roughing Out the Basic Shape of My Monster
Once I had a basic shape for my Lovecraftian-inspired Rock Worm, it was time to add some extra details. As it is an underground rock worm, I started by cutting semi-circles out of the polymer clay to act as armour as it burrows through the hard rock.
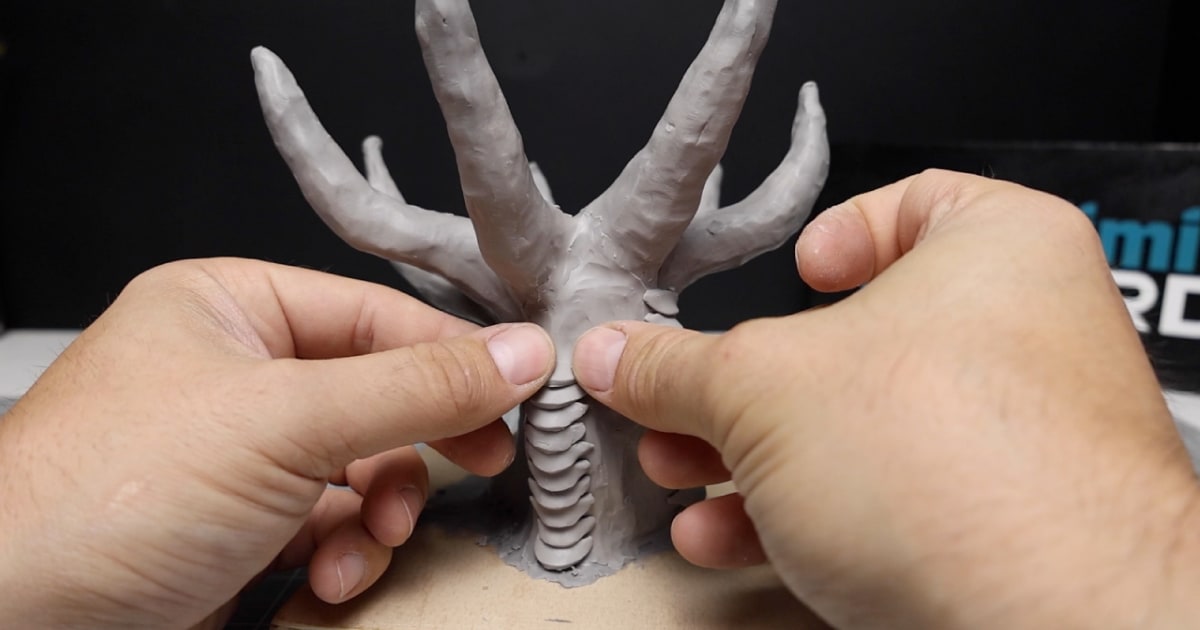
I then added some extra details. The first was around the top of the worm’s core body, where I added a rolled-up wormy of clay to form the basis of a mouth opening where the tentacles come out.
After that, I added support worms on the body next to the armour to distinguish between the different body areas.
Adding the Finer Details to the Body of My Clay Rock Worm
Once I had finished roughing out the body of the rock worm using Sculpey, it was time to start adding the details.
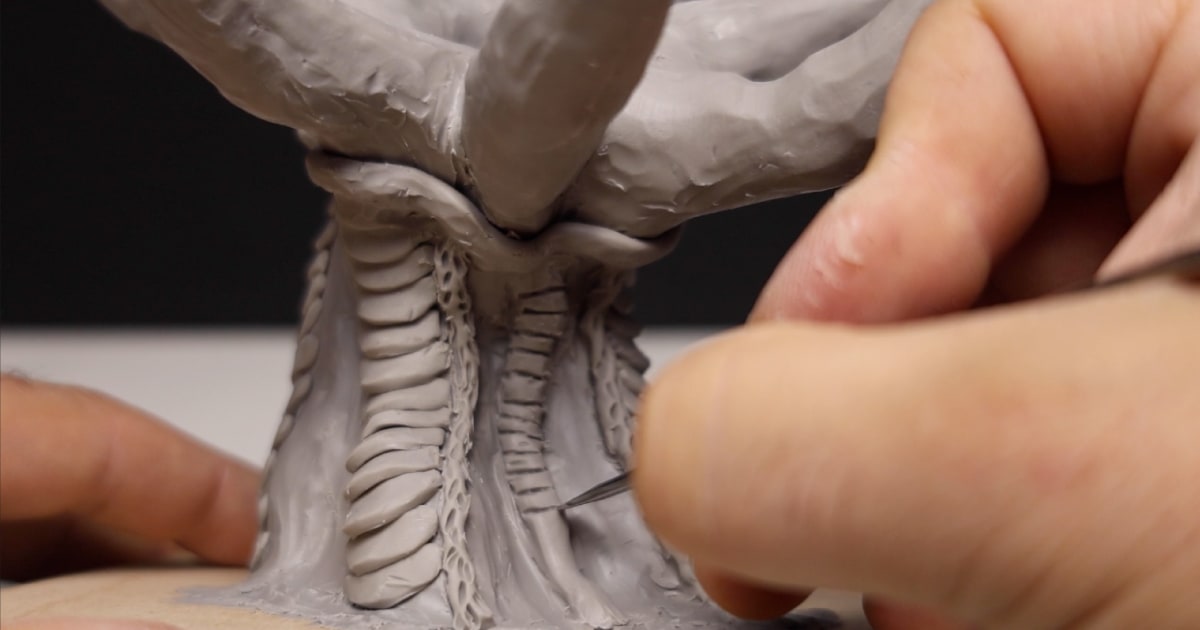
As you can see from the image, I started adding some details to the body of the worm making the core look almost like an external spine, while the worms down by the armour were given more of an organic look and feel.
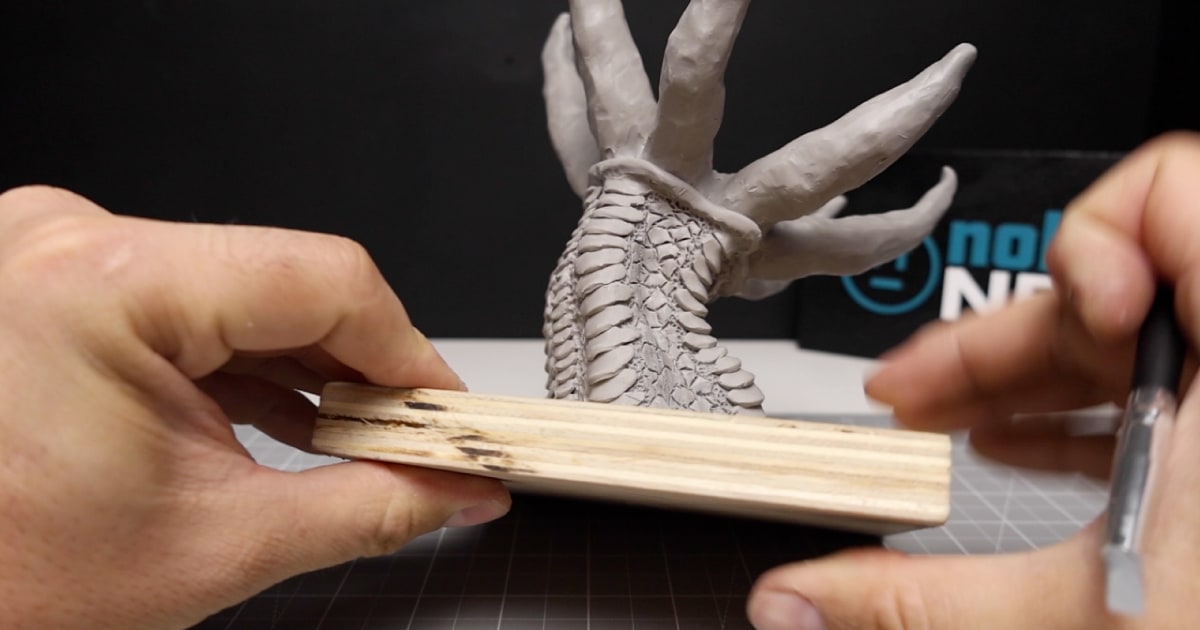
I also blended in the armour scales and put some lines in them to make them look like they had been through tough battles.
After this, I used my sculpting tool to create lines that make the remaining exposed body areas between the armour and the worms look like they’re made from rock.
The Worm Tentacles Come To Life
After the body was complete, it was time to focus on the seven tentacles coming out of the mouth area.
Not having created a detailed sketch before starting this polymer clay project, I had no idea how I was going to detail the tentacles. This meant that I had to do a lot of trial and error before finalising what you see in the image below.
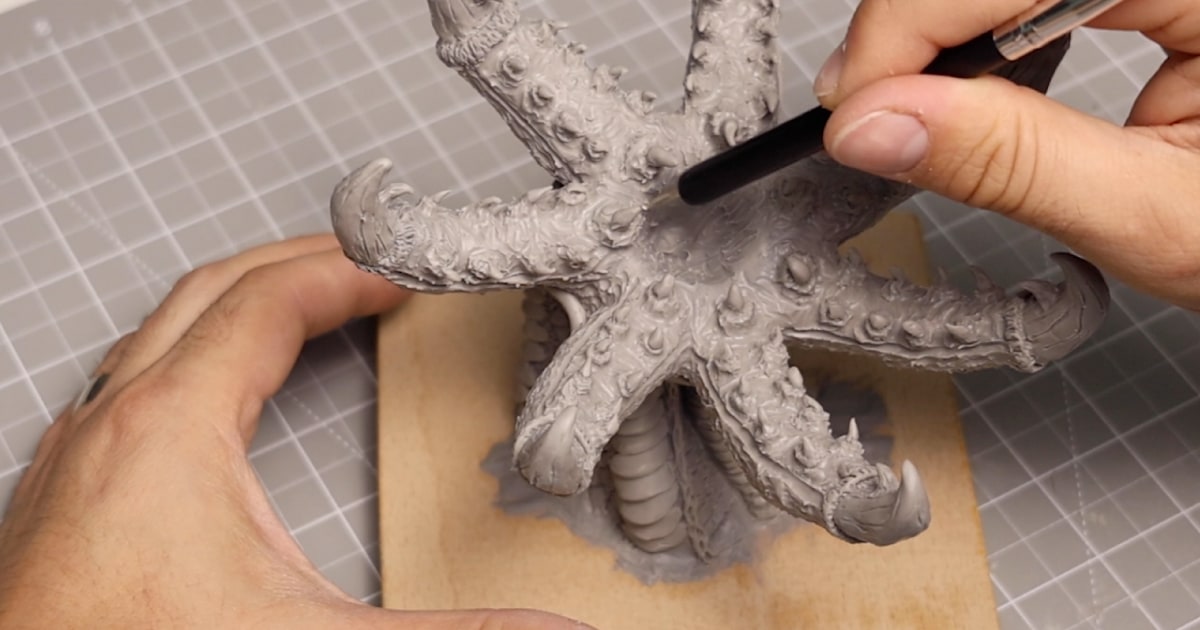
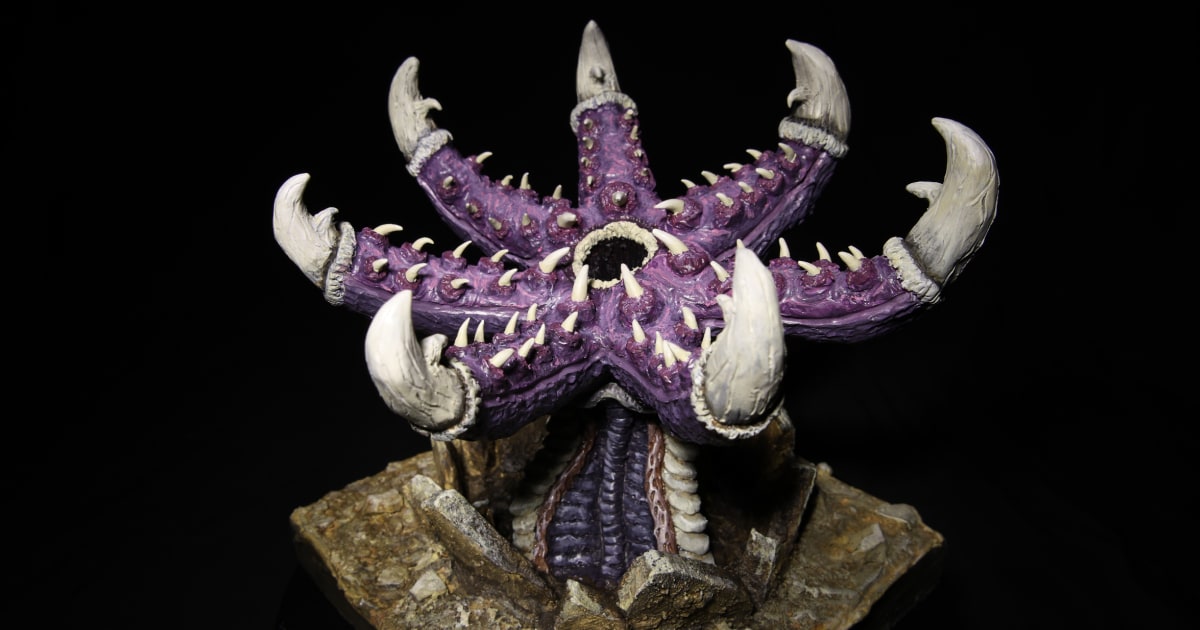
I started by defining the fleshy inside of the tentacles and the more robust yet still organic feeling outside. I then added some clay worms around the tips of the tentacles to separate the bony teeth at the end of the tentacles from the fleshy part.
Once I had done that, it was time to add smaller bony teeth to each of the tentacles. In my head, these teeth help the worm grip on to any prey that it eats.
This idea didn’t quite go to plan. Initially, I just formed them out of clay and added them into place, which looked a little messy. So, after I had finished, I removed the 63 teeth and made some new ones out of clay, but this time, I baked the teeth separately before adding them back to the sculpture.
Baking the teeth proved to be the right decision; it made them easier to add and looked ten times better.
Time To Add a Mouth to My Rock Worm Beast
As the mouth of my rock worm is round, I created a ring out of clay and, using my metal sculpting tool, added it into place by blending it with the main body.
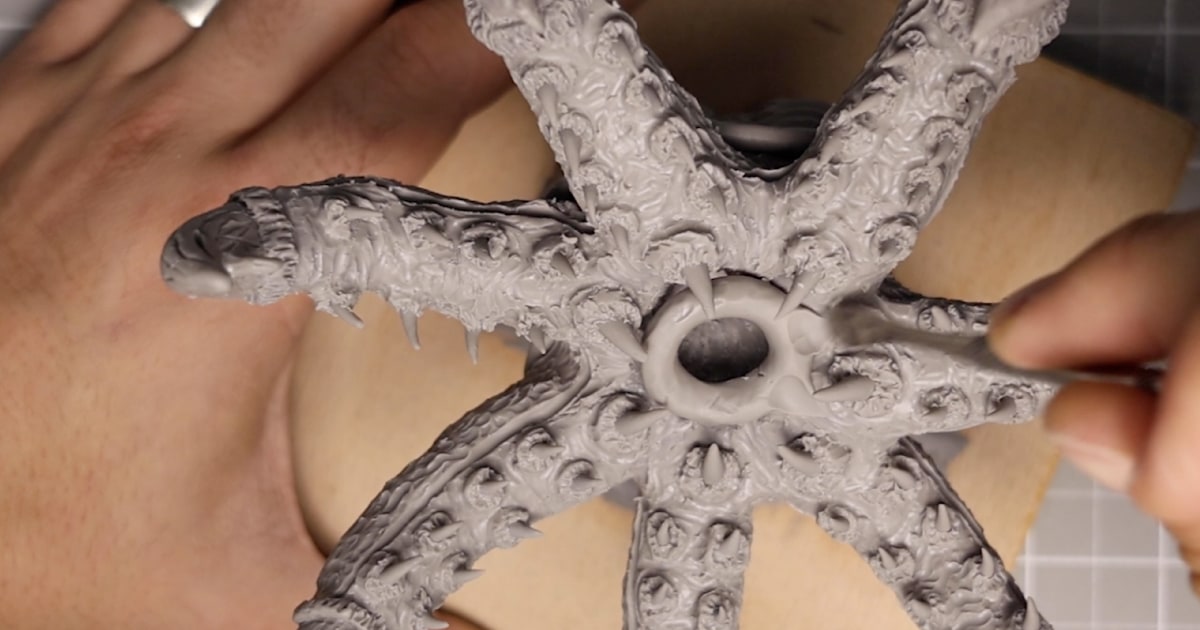
This wormy addition formed a lip on the entrance to the mouth, which made it kind of like a butthole (not my intention). To differentiate it, I then added some lines to make it look almost like a sharp, bony structure on the inside that takes the prey down into the belly of the beast.
After this, it was time to bake the Sculpey.
I followed the instructions on the packet, which stated to cook at 130C (275F) for 15 minutes per 6mm (1/4 inch) thickness of clay.
Because this was quite thick in places, I decided to bake it for around 45 minutes, which seemed to work well. Once that cooled, it was time to move on to making the base of my Diorama.
Making the Diorama Base: Plywood & Plaster
This being the first ever Diorama that I had ever made, it was time to put my childhood-making skills to the test.
I had a load of 18mm plywood left over from various previous house projects, so I thought, why not use that? It’s what you can see in the previous images, which I attached the armature to.
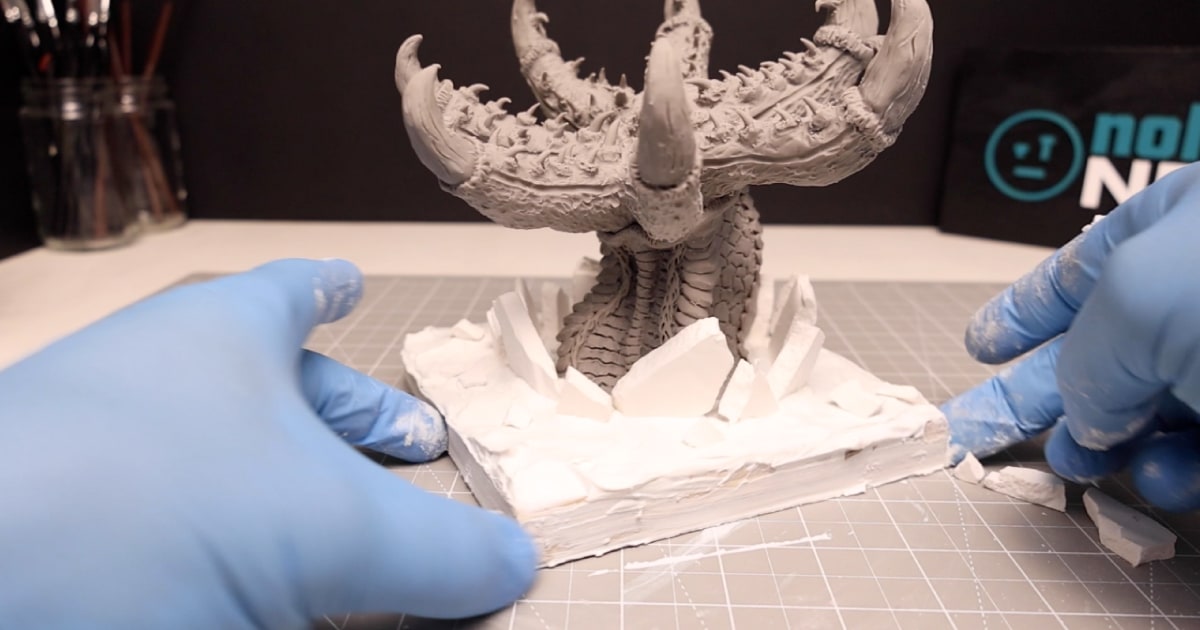
The plywood proved a good base to add the Plaster of Paris. I chose plaster of Paris instead of more clay due to its expense. Clay is super expensive, and plaster is a lot cheaper.
It’s also a good medium to use as you can make it as thick or thin as you want, it has a decent work time, and you can premake pieces, which is exactly what I did. Premaking the rocks that I then pushed into place, making it look like the rock worm was bursting out of the ground.
Time To Paint The Base & Beast
A coloured sketch would have been really handy when it came to painting, as I once again needed to figure out what colour to paint this sculpture.
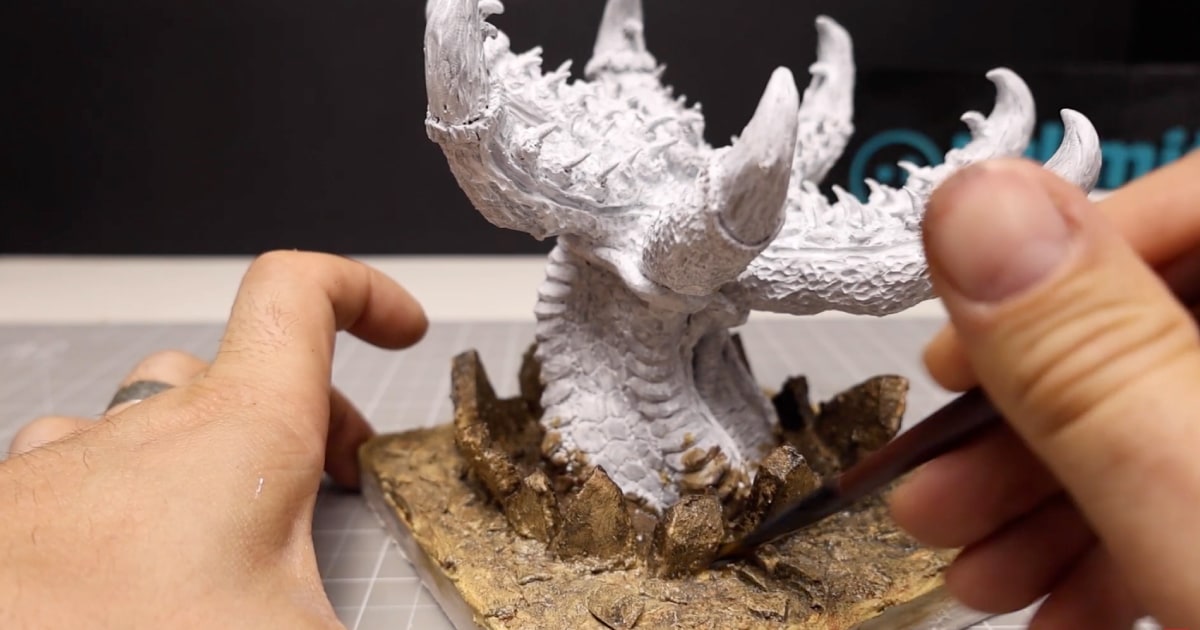
I base coated the whole structure, base and all, in white acrylic to help seal in the clay and the plaster of Paris, which is super porous.
After this, I turned my attention to the base, giving it a sandy colouring. I started with a base colour, adding a darker-coloured wash to the whole base before adding some highlights using some basic dry brushing.
I don’t have a dry brush, so I just make sure not to load up my flat-headed paint brush too much, wiping it off on a kitchen towel before gently brushing over the high-point areas.
Blocking out Colours
With the base done, it was time to move on to the main attraction.
I blocked out the main colours of the core structure using acrylic paints, which gave the body of the beast its overall colour scheme.
After blocking, I added a wash of black to get into all the cracks and then added specific highlights to the key areas to make the details come to life.
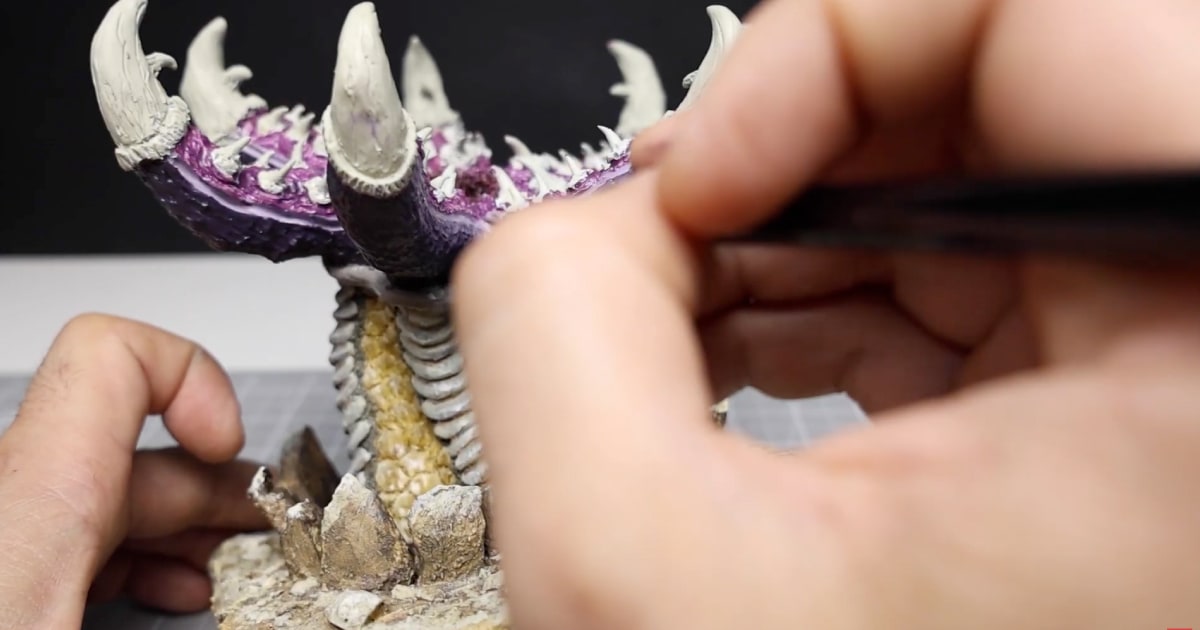
With the main body done, I turned my attention to the tentacles, which proved to be somewhat more challenging and time-consuming than I had first thought.
Painting Sculptures takes Time & Patience
Given the sheer number of teeth on this beast at around 70, it wasn’t easy to paint them all.
I started with the fleshy parts first before moving on to the teeth, giving them a bony white colour to look like they had built up a little plaque over the years. Rock worms aren’t known for their oral hygiene.
I must have done hours of touch-ups on this sculpture due to the positioning of the teeth and my lack of painting skills.
But when I was happy with what it looked like, it was time for the reveal.
Watch More Videos & Read More Tutorials
I hope you’ve enjoyed my walkthrough on how to create a fictional rock worm figure.
Don’t forget to check the video and my other videos here on NoLimitNerd.com or on my YouTube channel first where you’ll get to see the videos first.
Please tell your friends, family and strangers to subscribe to help me grow my channel, and like and comment to let me know what you want to see next.
Tools I Used
Heads up. Some of these links are affiliate links if you click on them and buy something I might make money which will help you support NoLimitNerd at no extra cost to you.
Sculpting Tools
- Super Sculpey
- A2 Cutting Board
- Pasta Maker
- Sculpting Tools
- Modelling Tools
- Vinyl Gloves
- Armature Wire 3mm
- Super Glue
Painting Equipment
Filming, Audio & Tech
- Cannon EOS R8 Camera
- Cannon RF 50mm Camera Lens
- Lexar 128GB SD Card
- Softbox Lighting with Diffuser
- Camera Tripod Ball Head
- Fifine Microphone (USB)
- Rotating Display Turntable
- Black Backdrop Cloth
- Microphone Arm – for Overhead Camera
